Quick case study…
1. This website used to get 15 new email subscribers per day.
2. Now it gets 75 per day.
What did I do?
I ran a small experiment in which I tested a handful of new lead magnet ideas, picked the ones that performed the best and then showed them to visitors on relevant pages.
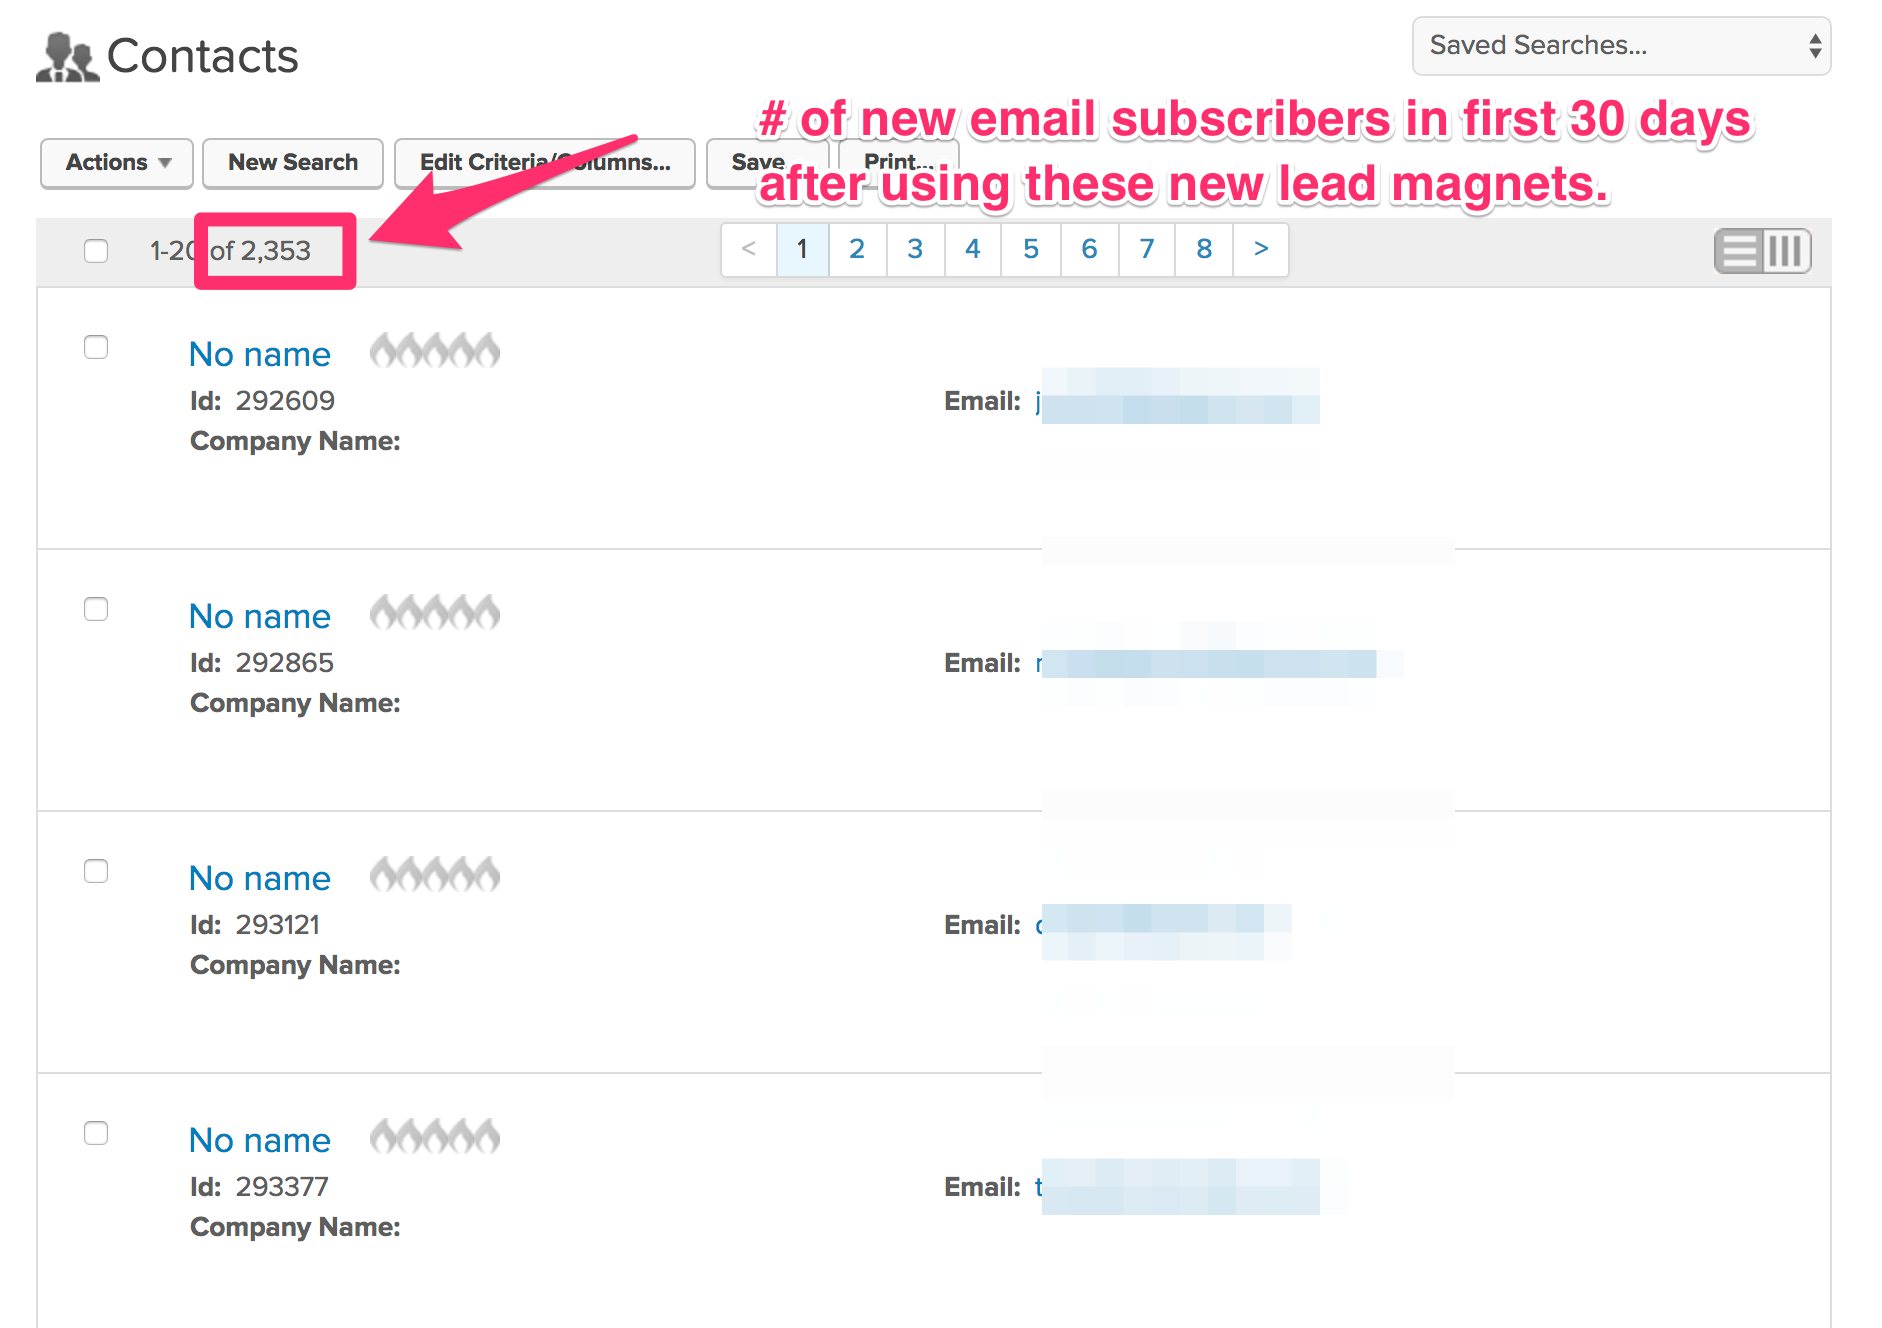
In this article, I’m going to share the 11 highest-converting lead magnets from that experiment. You’ll also get downloadable free lead magnet templates and real-world examples of each.
So if you’ve been looking for fresh and unique lead magnet ideas–keep reading…
Lead Magnet #1: Turn your most popular article into a checklist.
One of the easiest ways to create a lead magnet is by turning one of your most popular blog posts into an easy-to-follow checklist.
3,000-word blog posts are great, but it’s really easy to get lost in them. By turning the post into a short checklist, the information becomes much more actionable.
This is pretty easy to do.
In this example we’ll use the post, How did Pat Flynn get 100,000 YouTube views and 764 new subscribers?
Here’s the process that I follow.
Step 1: Outline your action steps.
In this article, I analyzed how Pat Flynn used a free tutorial based video series to grow his YouTube channel. What I didn’t do in the post was tell you how to do the same thing.
That’s where the checklist comes in.
To create the checklist, I quickly outlined the 7 steps I would follow to implement this strategy for my own business.
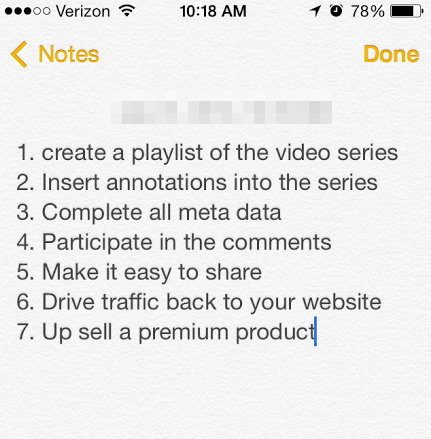
Tip: If you feel stuck in creating your checklist, ask yourself these questions.
- If I were telling my 5-year-old kid how to do this, what steps would I give him?
- How can I make this extremely easy and foolproof to implement?
- Can I use pictures to make it even clearer? (If so, use them.)
If you’re still stuck, take a drive over to wikiHow.com and check out some of their checklists. They are really good at boiling complex processes down into easy-to-follow checklists.
Here are a few examples to get your juices flowing:
Step 2: Provide details on each step.
Now you need to elaborate on each step of the checklist. I try to keep these short descriptions under 200 words.
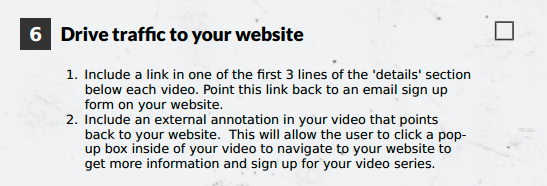
Here’s an example of a step description from the Pat Flynn checklist:
Step 3: Format and finalize the checklist.
I use a program called Process.St to create my checklist. They make the checklist process much quicker and they are designed well.
If you want a free option, you can use Google Docs to accomplish much of the same thing.
- Write your full checklist in a new Google Doc.
- Format it to look like you want.
- Then click File > Save as PDF to export it.
Bonus: I’ve included a pre-formatted Google Doc in the bonus section of this post. (click here to download )
Time: Start to finish, creating a checklist version of your post should take no more than 15-20 minutes.
Lead Magnet #2: Create a package of relevant links.
Suppose you’ve never cooked on a charcoal grill before and you want to learn. So, you do what anyone would do and Google “How to cook on a charcoal grill”…
…and you run across this article, How to Prepare a Charcoal Barbecue for Grilling.
In the article is every step you need to follow in order to cook on a charcoal grill.
Now suppose that at the end of the article is a downloadable list of recommended equipment to buy to get started
It contains:
- 4 different grills (all at different price points)
- 3 types of briquets
- 5 different chimney starters
- And a package of lighters and lighter fluid
Literally everything you need to start cooking. All you have to do is click the link and enter your credit card information.
Would that be helpful?
Absolutely!
The good part for you (the content creator) is all that “list” needs to be is a link to the product listings on Amazon.
Spend 10-15 minutes. Throw them in a Google Doc (see instruction on that in the previous step) and export it as a PDF.
Here’s an example:
Recently I wrote a post called How to go from one Facebook ad to $197 in less than 60 seconds.
In the post I described an advanced technique for creating a one-click upsell. (For all the details, go read the post.)
In the bonus section, I included links to support documentation that describes exactly how to set up this technique in 4 of the most popular shopping cart programs.
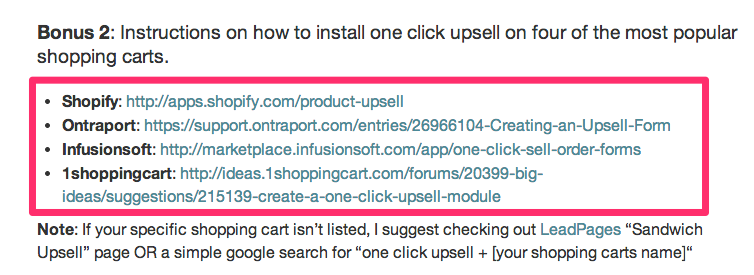
This specific lead magnet converted 42% of all people who read it.
Here’s a list of 5 different types of links you could include in your lead magnet.
- Links to support documentation
- Links to a YouTube video that goes into more depth
- Links to other relevant blog posts on the topic
- Links to equipment or software that would aid the implementation of your post
- Links to a checklist or a template that someone else created
Lead Magnet #3: Make a short how-to video.
This is my personal favorite. There’s nothing more helpful to me than to read a blog post that teaches a new concept and then to jump over to YouTube and see that concept in action.
Think about it: Would you rather read a long post or watch a 2-minute video? What if you could do both?
Here’s an example: How to create a high converting pop-up in 5 minutes.
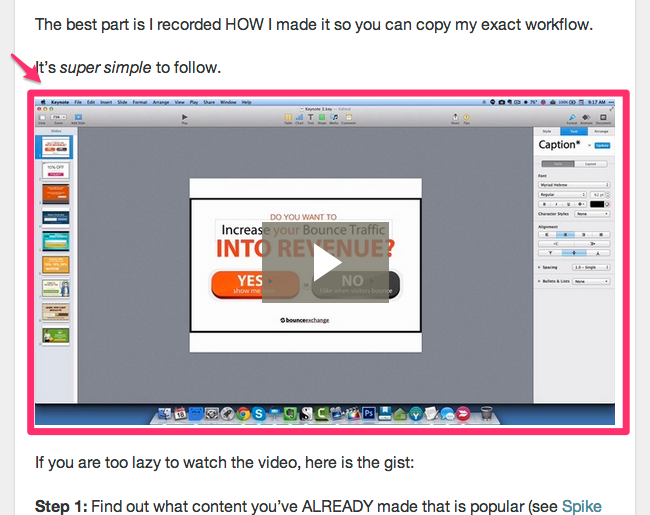
Creating a how-to video for each blog post can sound intimidating, but once you see the process, I think you’ll change your mind.
Here’s how to do it:
Step 1: Set your expectations.
Don’t feel like the production quality has to be high. It doesn’t. This isn’t a paid product you are making; it’s a free giveaway.
You never want publish something that looks terrible AND isn’t useful.
Just remember, the point is to be helpful–not to win an Emmy.
Step 2: Outline your content.
The key to creating a how-to video in under 30 minutes is your outline.
In the above example, I quickly jotted down a 4-part outline before I started recording.
This was my outline:
- Intro Greg
- Examine site in BuzzSumo
- Choose template
- Customize template
Step 3: Record the video.
I use Camtasia to record all of my how to videos. It allows you to record your screen and webcam at the same time.
Two things to keep in mind when recording:
1. Do it all in one take.
Don’t psych yourself out with this part. Make your outline, know your content and just start recording.
People like raw. My most popular videos are ones that were off the cuff, with dead airtime and not edited at all.
Your readers are looking for actionable information. Focus on that.
2. Use your iPhone headphones as a mic.
An easy way to immediately make your videos better is to use your iPhone headphones when recording. This makes your sound quality MUCH better than recording from your computer mic.
It’s a really quick way to instantly improve your video, but again, don’t obsess over this.
Step 4: Trim and upload.
Up to this point you have outlined your video, put on your headphones and recorded the tutorial.
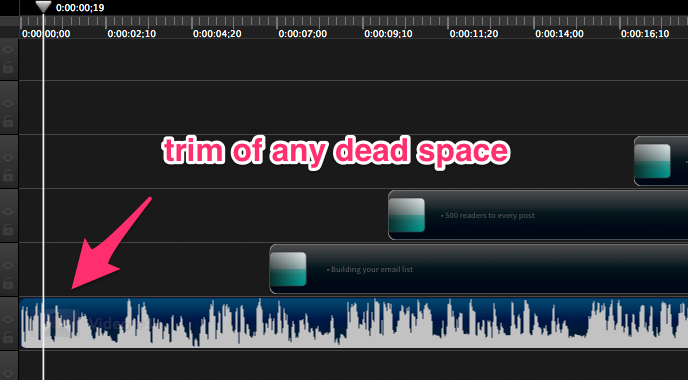
Now, trim off the beginning and end of the video. Usually I’ll have 10-15 seconds after the video starts recording where I’m fumbling around and getting everything set up.
Use Camtasia to trim this section off. Also, fast-forward to the end of the video and trim off any dead space there too.
Then… upload it to YouTube and embed on your bonus page. (Details on how to deliver the bonus to your readers here.)
Time: Start to finish, this should take no more than 15 minutes.
The KEY to this is to do it in ONE TAKE. Don’t obsess over it.
Lead Magnet #4: Record a quick Q&A video.
This is similar to #3. However, instead of recording a how-to video, you are going to record an answer to 2 questions related to your blog post’s topic .
Your readers will always have a few questions after reading your post. Anticipate and answer these in advance.
Record a quick video of you answering two of these questions and offer them as a lead magnet.
One easy way to come up with questions to answer is Quora.
Step 1: Enter your keyword phrase into Quora.
Let’s go back to our “How to cook on a charcoal grill” example.
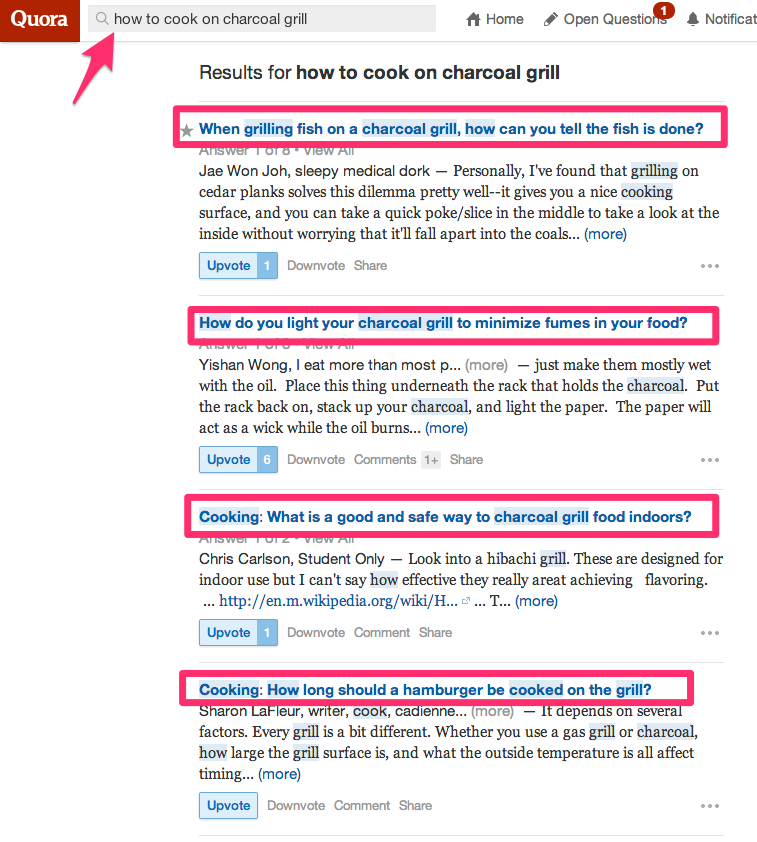
If we enter that keyword phrase into the Quora search bar, it returns dozens of questions that people are actually asking about that topic.
 a
a
Step 2: Make a list of two of the most relevant questions.
Jot down two questions from the search results that are related to your topic.
Sometimes you might not know the answer and that is the beauty of using Quora. You can click on the question and get the answer in seconds.
For example:
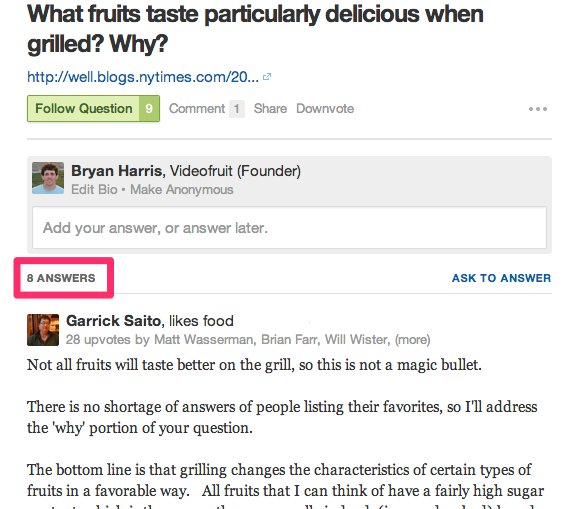
Let’s say you wanted to answer the question: “What fruits taste particularly delicious when grilled?”
Just click on the question, read the 8 answers to the question and formulate your own response.
Step 3: Record the video.
Follow the exact same steps given in the “how-to video” section above. However, most of the time with a Q&A video, you don’t need to record your screen, just your webcam.
Toggle the webcam option off and start recording.

Time: Total time, start to finish (including research), should be no more than 20 minutes
Lead Magnet #5: Turn your most popular article into a PDF.
I didn’t like this idea at first. Then I tried it one time and the feedback from my readers totally changed my mind.
I thought that copying the post and putting it in a PDF would be kinda… lame.
But I learned blog posts are hard to implement from.
Think about this blog post. You read (skim) the post and decide you want to use this method on your site. But to do that you have to bookmark this page, remember which folder you saved it in, and then scroll endlessly down the page to find the instructions for the lead magnet you want to create.
Then when you get to actually implementing, you have to constantly flip back and forth between this article and the one you are writing. It’s a pain.
Blogs are great for teaching in a linear fashion, but they are NOT reference books.
By putting your blog post into a downloadable PDF format, you accomplish two things:
- Increased perceived value: Which is more valuable, a “blog post” or an “e-book”?
- Increased efficiency: I can save a PDF to my desktop or even email it to my Kindle. Much easier than remembering the URL of an article.
This is how you make a PDF version of your post.
Step 1: Create a new Google Doc.
Step 2: Copy and paste your entire article into the Google Doc.
Step 3: Fix all formatting issues (image sizing, chapter divides etc.).
Step 4: Export as a PDF.
Here is a quick video tutorial on how to do that:
Time: Start to finish, this should take no more than 10 minutes.
Lead Magnet #6: Create a mini video course.
This has the highest perceived value of all of the lead magnets that I have tried.
A mini video course is a combination of the “tutorial video” and “Q&A video upgrades” previously covered.
Here is an example of a mini course that I created (38% opt in rate): The High Jump Formula: Mini-Course
To create a mini course, follow this outline:
- Video #1: Tutorial Video (2-3 minutes long)
- Video #2: Tutorial Video (2-3 minutes long)
- Video #2: Q&A Video (2-3 minutes long)
For example: If we were making a mini video course on “How to turn a blog post into an e-book,” our mini course might look something like this:
Video #1: Topics Covered (Tutorial)
- How to create a new Google Doc
- Setting up the margin properties in your Google Doc
- How to create a title page
- How to create the table of contents and link to chapter divides
Video #2: Topics Covered (Tutorial)
- How to get your blog post content into the Google Doc
- How to properly format the content
- How to link to your website from the e-book
Video #3: Q&A (Q&A)
- How can I get a cover professionally designed?
- Is it possible to list my e-book on Amazon?
This type of upgrade has the highest likelihood of going over our 30-minute time limit.
However, it’s definitely doable. One way to cut down the time spent creating the video is to make one long video that you then cut up into 3 separate videos using Camtasia.
Press record and shoot all of your footage, then cut and paste the footage into three different projects.
TechSmith (makers of Camtasia) have an extensive library of how-to videos to help you learn how to do this: Tutorial Videos.
Time: 30 minutes.
Lead Magnet #7: Give away exact scripts.
Many topics that I teach lend themselves to being asked questions like: “What was the subject line of the email you sent?” “What did you say when you cold called?” OR “Can you share the source code of the sidebar you used?” “Which headline received the best response rate?”
Your industry may or may not lend itself to similar types of questions.
However, I encourage you to explore how you can give your customers exactly what they want in a script format. These have been among the most demanded bonuses that I’ve made.
To get your juices flowing on how you can use this in your industry, ask yourself these questions:
- Is there a common formula I use that I can share with my readers?
- How can I give my reader exactly what I wish I’d had when starting out?
- Is there a mantra, quote or common saying I use in my business that they can use?
Once you’ve come up with the script, simply put it into a text file and offer that text file as a download in exchange for their email address.
Here is an example of how I did this: How to get a $3,000 monthly contract (with exact scripts)
Time: Start to finish, less than 10 minutes
Lead Magnet #8: Give away your swipe file.
A swipe file is more common in marketing and copywriting, but can be expanded to many other industries as well.
Traditionally a swipe file is a tested, proven collection of advertising headlines.
If you were writing a headline for your magazine article, you would reference your swipe file first and draw inspiration for your headline from a list of 50 other headlines. However, swipe files have many more applications than just advertising headlines.
Here are a few from a variety of industries:
- Recipes (cooking)
- Workout sheets (fitness)
- Landing pages (marketing)
- Prayers (religion)
- Speeches (public speaking)
Once you have identified the contents of your swipe file, you need to package it into an easily deliverable format.
I’ve found that, for most written mediums, Evernote works extremely well.
Here is a quick tutorial on how I use Evernote to manage my swipe files:
Lead Magnet #9: Give away templates.
My readers absolutely love templates. A template is like :swipe files meets exact scripts.”
I gave away three templates in this post and got a 36% opt in rate.
Like the previous two lead magnet types, depending on what industry you are in – you’ll need to put on your thinking cap to come up with a template appropriate for your audience.
Here are a few ideas to get you started
- Writers: Blog post template (example)
- Religion: Prayer templates (example)
- Web design: Full website templates (example)
- Marketing: Pop-up design templates (example)
If you need help coming up with ideas for a template for your business, leave a comment below the post and we’ll all try to help you!
Lead Magnet #10: Run a software giveaway.
Software giveaways can be extremely effective. AppSumo built an email list of over 700,000 subscribers by hosting giveaways and providing major discounts on popular software products.
I’ve done this three different times on Videofruit and it has worked moderately well. I’ve averaged a 23% conversion rate.
There are two steps to hosting a giveaway:
Step 1: Identify relevant software for your audience.
One of the easiest ways to find relevant software in your industry is to do a quick Google search for “[keyword]” + software
For example: If you run a fitness blog, you can search for…
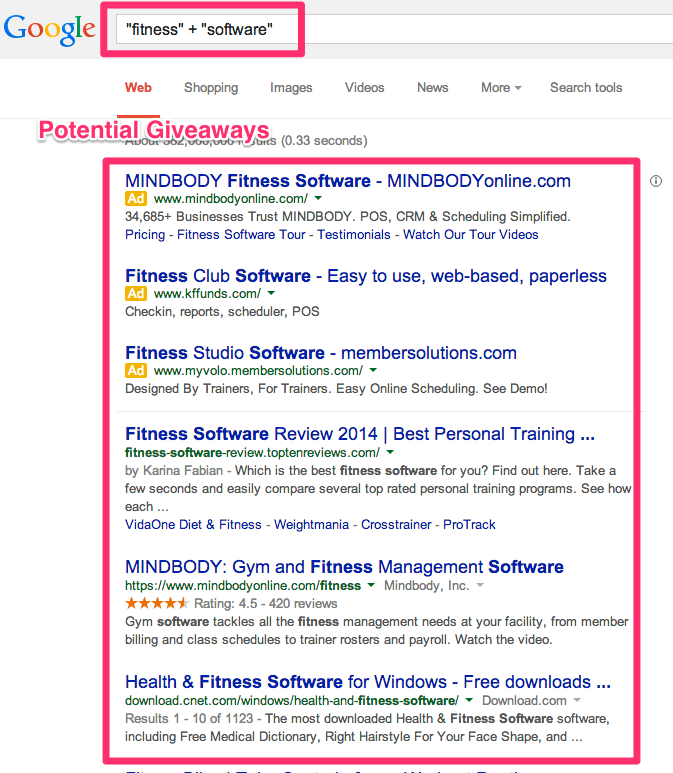
From these search results, you can identify the high-priority software companies to focus on.
Step 2: Run the deal.
The temptation is to approach the software company and get them to go in with you on the promotion. Don’t do that. It will slow you down, and at this stage you don’t know if your audience will resonate with the offer.
Noah and his team at AppSumo have found it’s easier and quicker to simply front the cost of the initial giveaway, judge response and THEN double down on the offer that is the most effective.
Here is an example of how AppSumo did this recently with a free Lifetime account of Buffer.

Time: This should take no more than 20 minutes to implement. (Hint: Use this software to host your giveaway.)
Lead Magnet #11: Give away time with you.
Last but not least…
Time with you.
Call it coaching, mentorship or masterminding. It’s the #1 thing that your readers want.
So give it away.
You can do this in the form of a Skype or phone call. You can even host a Google Hangout and include more than one person.
How to Double Your Lead Magnet’s Effectiveness
There you have it: 11 killer killer lead magnets that you can use to grow your email list.
Now you have no excuse for not using this strategy.
My challenge to you is to try it once. See for yourself.
I’ve put together a swipe file *wink wink* of every lead magnet that I’ve published on this blog.
This is a great resource to get you kick-started in creating your next lead magnet.
• See how bad my initial ones were. (Hint: they still worked really well.)
• Study how I put my videos together.
• Reverse engineer the entire sales funnels I used to turn these free giveaways into paid products.
You can download that entire swipe file (for free) here.
Alright, earlier in this post, I mentioned a technique for doubling (or even tripling) the effectiveness of your lead magnet.
I used this technique last month and collected 503 email addresses from ONE article.
But I’m at 3,700 words in this post and I’m an hour past the time I was supposed to be finished writing.
So let’s get to that next week.
Be sure to grab the swipe file: You can download that entire swipe file here.
PS: Do you have another type of bonus that you’ve tried and would like to share? Leave it in the comments section below.
Want us to find the best 2-3 growth opportunities for your business?
Book a free Strategy Call with our team. We’ll look under the hood of your business, identify your best growth opportunities, and show you the action plan for taking advantage of them.
Schedule a free call with a Growth Tools coach!