18 months ago, this blog didn’t exist.
Then last month I used it to launch a new online course that produced more revenue than my entire gross income from 2008 to 2011 combined.
Honestly?
I’m still in shock at what happened.
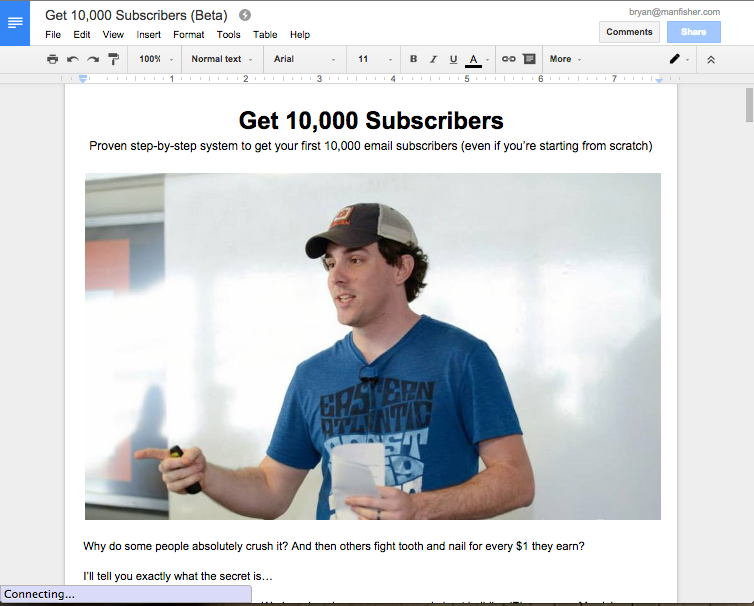
Today I want to show you behind the scenes of the launch of my new signature course, Get 10,000 Subscribers.
I finished creating the course on April 27th and sent an email announcing that it was for sale on April 28th.
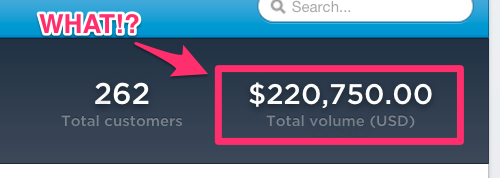
10 days later, 262 people had paid (on average) just over $800 each.
Total invoiced sales = $220,750

I’m going to walk you through the exact process I used to figure out what course to create, then I’ll show you how I made it and give you the launch sequence I used to generate $220,750 in revenue in a 10-day period.
By the end of this article you’ll have a complete road map to follow in my footsteps.
What if the entire thing bombs?
It’s easy to have some degree of success and then to look back on it with rose-colored glasses, acting like you just knnneeew that you would do well the entire time.
Last week I asked all of you to tell me what you wanted to know about the launch.
This was my favorite question:
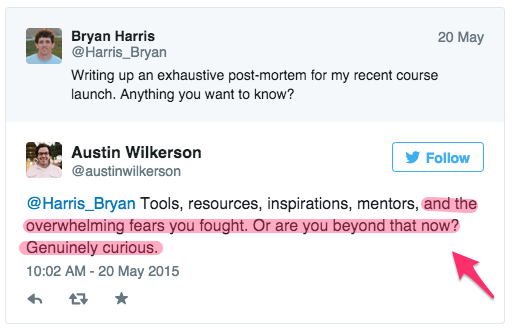
Let me be clear…
I was completely scared to death in the days leading up to the launch.
I had no idea that it would be a smash hit.
“What if I just spent 3 months building something and no one buys it?”
“I’m the email list guy. What if I just built an email list of people who won’t buy from me? How could I possibly continue teaching about something I suck at?”
“I’m about to have a kid. This launch BETTER go well or I’m going to have to go back to working for someone else.”
The night before the launch, I was laying in bed talking to my wife about how scared I was.
Our conversation went something like this:
ME: “I have no idea what’s going to happen tomorrow.”
HER: “What’s the worst-case scenario?”
ME: “I sell a handful of copies and make $5,000.”
HER: “That sounds pretty good to me!”
ME: “I just spent 500 hours on this. I could deliver pizza, make more money and be way less stressed.”
HER: “What’s the best-case scenario?”
ME: “My goal is to do $40,000 in sales from the entire launch. ”
Of course, all of these fears were completely irrational.
In the first 24 hours the course did $72,000 in sales.
= *mind blown*.
Here is the main takeaway for YOUR fear:
Your fear is stupid.
Your fear is irrational.
Your fear doesn’t take into account your 20+ years of work.
Your fear is sometimes right.
You fear always needs to be ignored.
Your fear causes you to lose trust in your plan.
Your fear wants you to abandon your project and “start” something else because it’s a much better idea. (Hint: it’s not.)
IGNORE THE FEAR.
Tell it to F$%* off.
Here are three practical things you can do to overcome fear when you are close to finishing your project but the voice in your heads gets so loud you want to succumb to it:
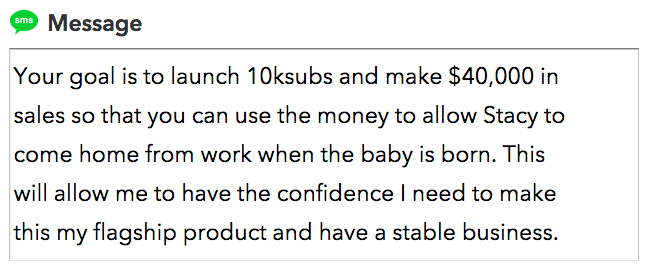
Step 1: Clearly articulate your WHY and text it to yourself every morning. (Use IFTTT to do that.)
Step 2: Write out positive affirmations about yourself and read them out loud every morning.
Step 3: Buy this book and read it every night.
Here is the “why” that I texted to myself every day:
Here are the affirmations that I read out loud to myself every morning:

These three steps helped me finish the course. Without them I would have quit months ago.
They helped me conquer fear and finish the biggest project of my life.
Don’t let fear win.
How to launch a $220,000 product
A few highlights to get you up to speed before jumping into the meat of the process:
 My email list had 13,528 active subscribers when the course launched.
- It was launched exclusively to my email list (no ads or affiliates).
- I first seriously considered making the course in December 2014.
- Before I created the online course, it was validated by a small segment of the list. (More on this in a minute.)
- It took 90 days to create all of the course content.
- I spent less than one day putting together the launch sequence and mostly just made things up as I went along. (It was a little more detailed than this but you get the point. No master choreography going on here.)
So…
How did all of this come together?
There were 4 phases of the project:
Phase 1: Figure out the topic of the course.
Phase 2: Validate that people would actually pay for the course.
Phase 3: Create the online course.
Phase 4: Launch the course to my list.
Let’s look at each phase in detail.
Phase 1: Come up with the perfect topic for your course.
Last December I showed you my process for coming up with the perfect product idea.
(That was the best article I’ve ever written. Go bookmark it now.)
Funny part is that through writing that article, I accidentally discovered that my readers REALLY wanted me to create an online course that showed them how to build an email list. The result of that discovery was the online course I just launched, Get 10,000 Subscribers.
How can you discover what online course your readers want you to create?
Follow these four steps:
Step 1: Make a list of your most popular blog posts (or podcasts or YouTube videos).
Step 2: Make a list of your most popular content upgrades.
Step 3: Analyze the categories of your most popular posts and content upgrades to find the topic of highest interest.
Step 4: Turn your most popular category into a product hypothesis.
This is how I did it…
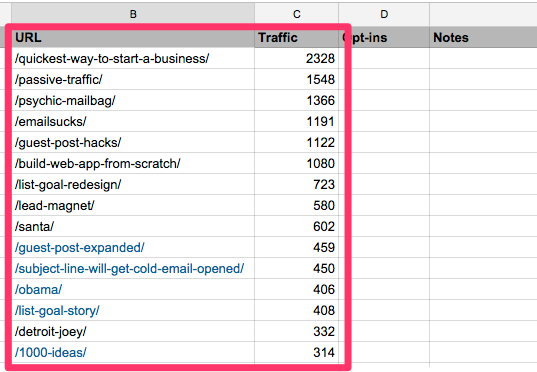
Here is the list of my most popular blog posts (sorted by traffic):
Here is a list of my most popular content upgrades (sorted by opt-ins):
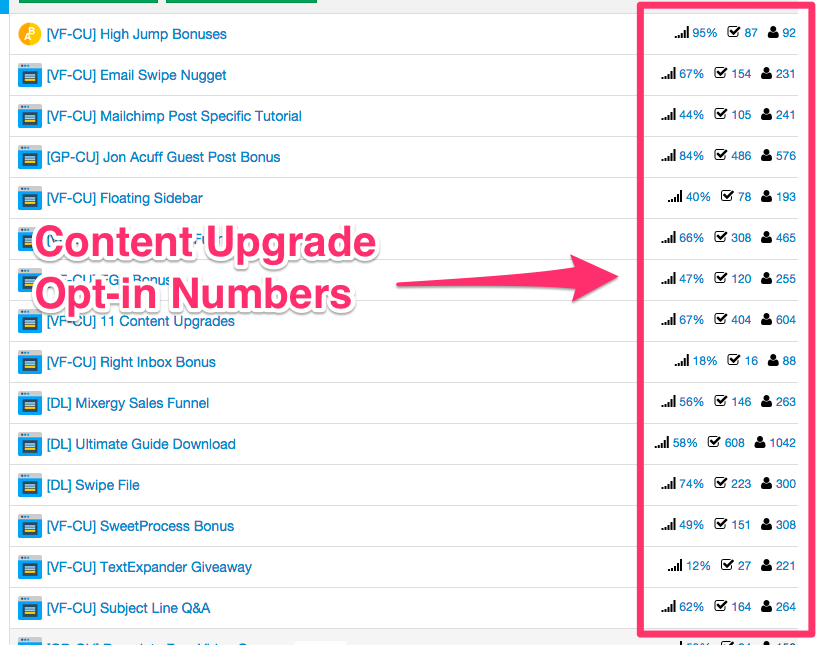
Through analyzing both of these reports I determined that there were two categories that got the majority of interest with my readers.
Topic #1: Sales
Topic #2: List Building
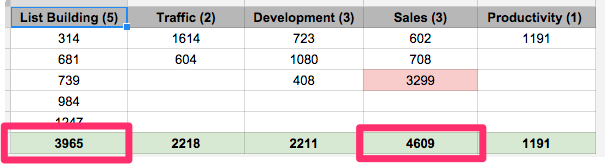
The majority of the interest in sales came from ONE blog post, indicating that there was interest in the topic, but there was more uniform and consistent interest in list building.
As a result, I picked list building to focus on.
Next I created a product hypothesis, which is just a fancy way of saying I wrote a short Google doc describing what the product would be.
Here is a link to the product hypothesis I wrote for my online course.
Tip: Have you not been writing or using content upgrades? Start now.
- Use this method to start writing. (Publish a new post once a week.)
- Follow this guide to start building your email list using content upgrades.
- Do both of these things for 90 days and you’ll be ready to start Phase 1.
Phase 2: Get people to pay you money before creating the course.
By this point I had a good read on what my readers wanted to learn more about and I had written a rough description of what my course would look like.
Now it was time to test my product hypothesis.
AKA: Make sure my readers would actually PAY ME MONEY before I spent months creating the course.
How did I do that?
By following these three steps:
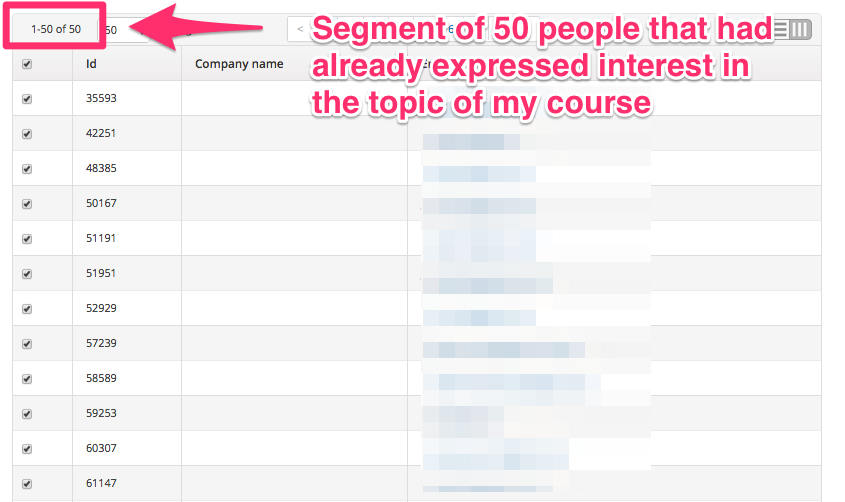
Step #1: Segmented off a small part of my email list that had previously expressed interest in the topic of the course.
Step #2: Sent a copy of my product hypothesis to them and asked for their feedback.
Step #3: I immediately sent a pre-order link to anyone who answered that they would buy the course.
My goal was to get at least 10% of the focus group to pre-order the course.
If I succeeded, then I would make the product.
If not, I would pivot and either abandon the idea, pick another topic or adjust the product hypothesis based on the feedback I received.
Let’s walk through my implementation of each step.
First, I created a small group of 50 people who had previously downloaded the content upgrade in this post. (Their download signaled that they were highly likely to be interested in my online course.)
Next, I sent an introduction email to that group of 50 people.
I didn’t want to ask these people to do something they hadn’t previously agreed to doing.
So, I sent this email to verify they wanted to participate in my project.

Of the 50 people I sent this email to, 36 responded and said they would like to participate.
Then I sent that group of 36 people this email:
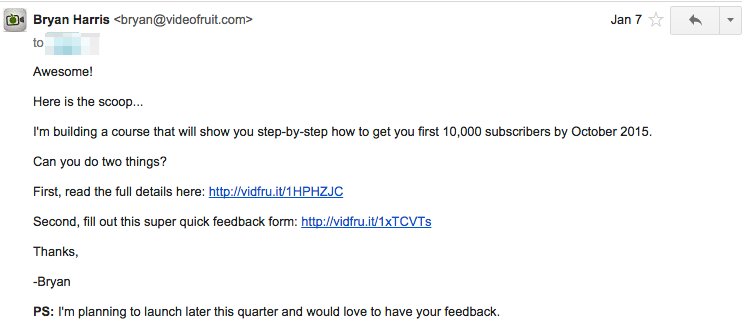
This email asks them to do two things:
Thing #1: Read my product hypothesis
Thing #2: Fill out a short survey with their opinion on the course
Here is what the survey included:
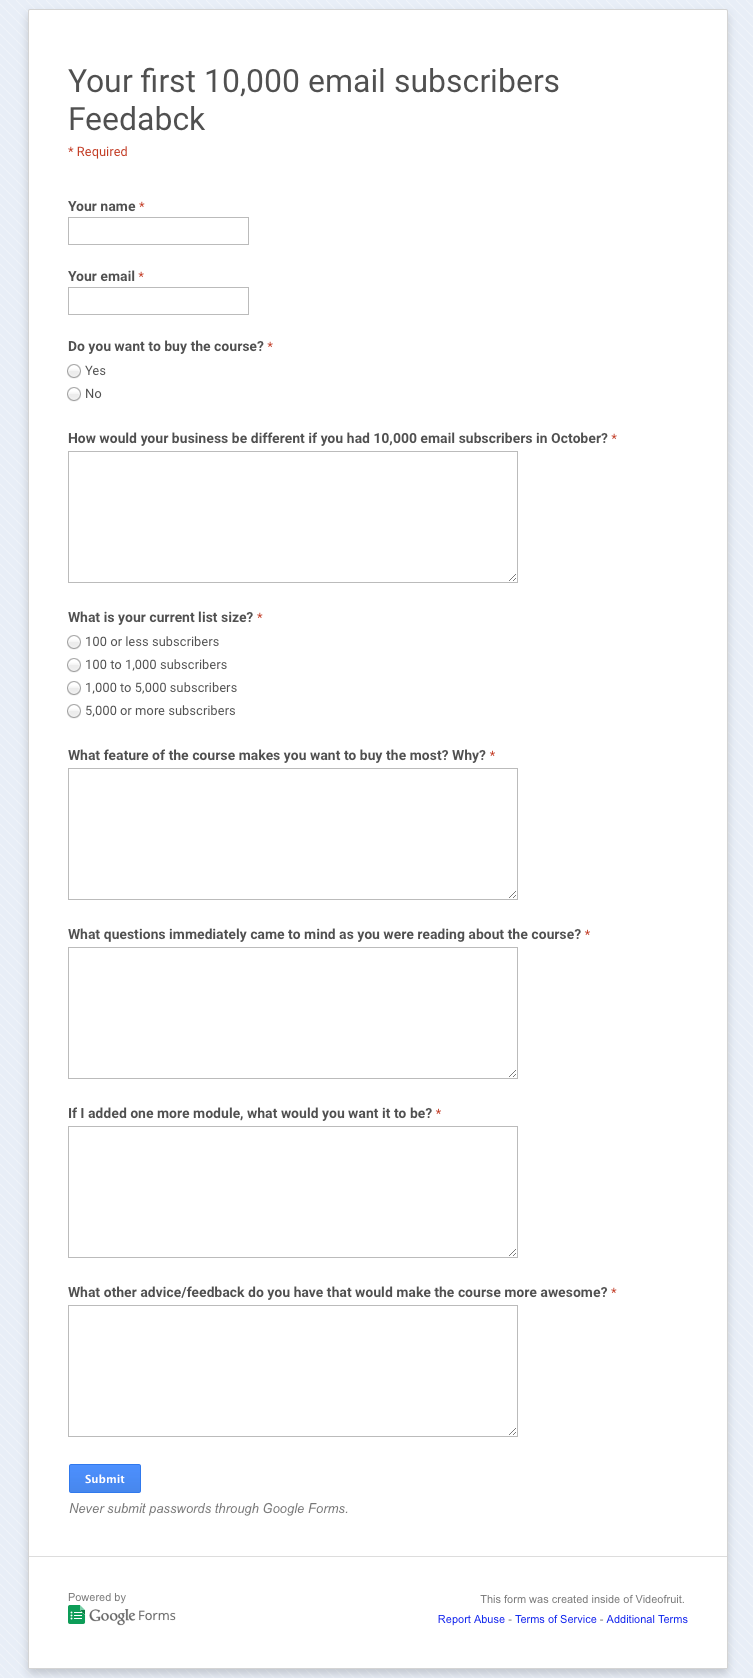
The KEY question I looked at in the responses was “Do you want to buy the course?”
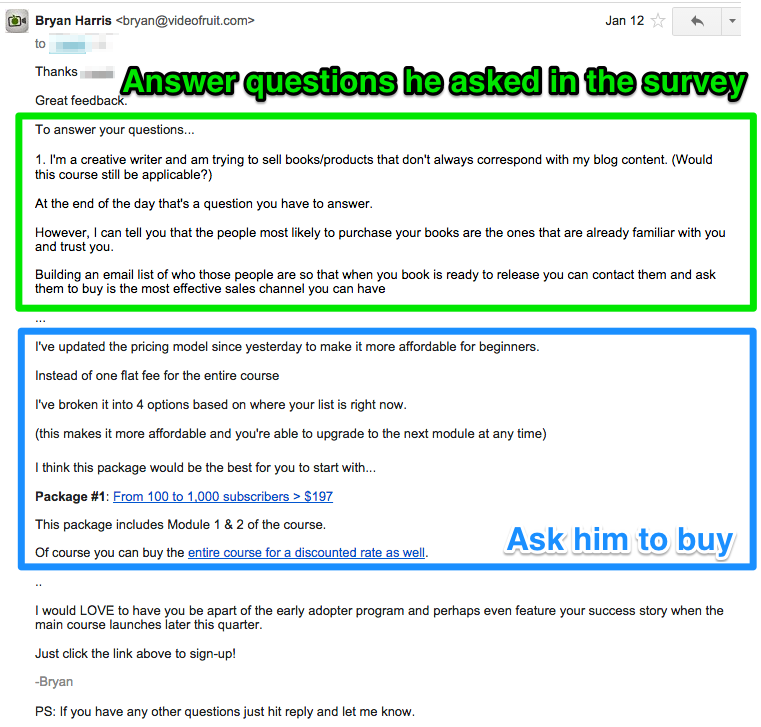
Anyone who answered YES to that question got an email from me.
That email did three things:
1. Thanked them for helping me
2. Answered any questions they asked in the survey
3. Gave them an invite and link to pre-order the online course
Here is an example of one of my response emails:
Then in Phase 4 of in the launch process, you’ll use this document as the start of the sales letter for your course. These questions and answers will make a HUGE difference in the effectiveness of that sales letter.
I repeated this process with 3 different groups (all of which had previously expressed interest in the topic of list building by downloading a content upgrade on that topic).
A group of 50.
A group of 75.
A group of 100.
The results?
Of the 225 people included in the 3 testing rounds, 39 pre-ordered the course.
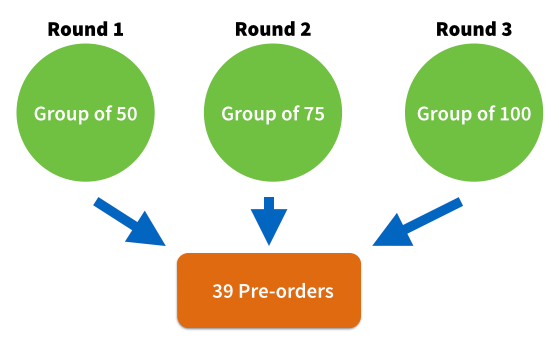
That calculates out to a 17% conversion rate (nearly double my original goal of 10%).
How can you do the same thing?
Step 1: First, complete Phase 1 to identify the topic your readers want to know about the most.
Step 2: Write your product hypothesis. Use my template as a model to write yours.
Step 3: Create your survey. This part is pretty straightforward. Just copy mine.
Step 4: Email a small group of subscribers who have previously expressed interest in the topic of your course. Use my template above to help you with this.
Step 5: Send a link to pre-order your course to anyone who says they would buy it. (Also, be sure to answer all of their questions.)
Phase 3: Build the online course (as fast as possible).
Quick recap…
So far I had identified a topic of extreme interest to my audience, written a product hypothesis and successfully tested that product by getting people to pre-order the course.
I now had the validation I needed to justify spending time and money to build the course.
Before you read further, I want you to do something…
Are you game?
Ok, good 🙂
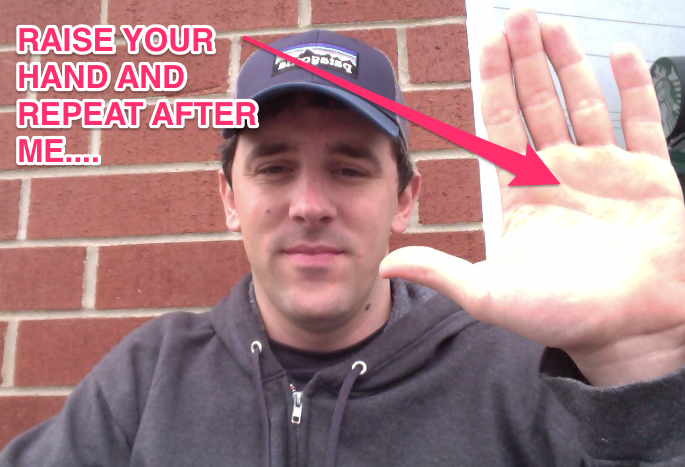
Thing #1: Raise your right hand.
Thing #2: Say this out loud…
I.
Promise.
Never to build a product.
Without first validating that people will actually pay me money for said product.
..
.
There are countless variables involved in creating and launching a product. This makes it highly unlikely that every product you create will be a smash hit.
BUT!
There is ZERO excuse for creating a product that falls flat on its face.
I’ve done that so many times I’ve lost count.
iPhone apps, courses, brick-and-mortar businesses… you name it, I’ve probably had the idea, tried the idea and completely failed at it.
If you repeat that mistake at any time in the future, that’s on you.
If you follow the first two phases of the course-creation process I’ve outlined in this post, your chances of creating a complete failure of a product evaporate.
..
Now let’s talk about making the actual course.
First, I’ll show you how I created the Get 10,000 Subscribers online course and then I’ll give you a few options for creating yours.
Step 1: Decide what format of course you want to create. (There are two different types.)
The Reference Course
A reference course allows students to jump around. Your students can pick and choose what content they consume and the order they consume it in.
The vast majority of online courses follow this model.
They are open-ended. Some are built to take you from Point A to Point B, but they don’t force you down a specific path.
My friend Joe has a reference course called Learn Scrivener Fast.
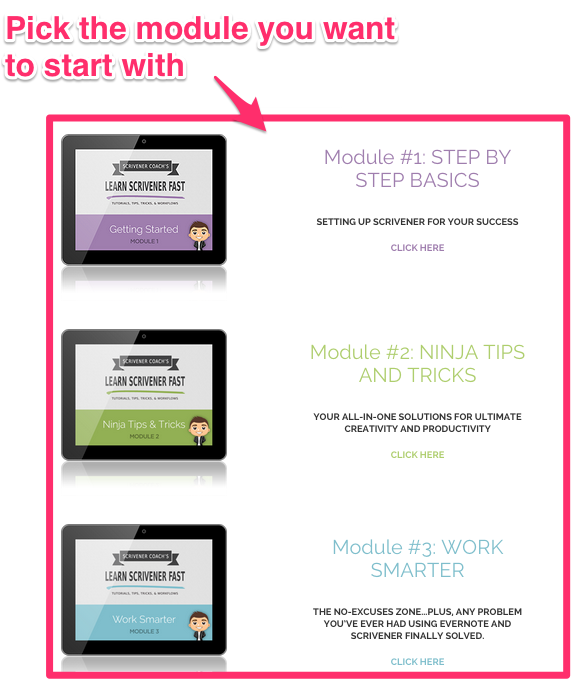
In the course you can bebop from one module to another. You can watch the video on how to sync Evernote with Scrivener and then go to the lesson on using Scrivener to organize and write blog posts.
People love reference courses.
The Specific Path Course
A specific path course is the exact opposite.
You can’t jump around.
It’s not open-ended.
And you can’t pick and choose what content to go through.
A specific path course starts you at Point A and walks you step by step to Point B.
No distractions. No fluff. Just straight-up coaching and direction to accomplish that goal.
The first specific path course I ever took was How to Make Your First Dollar by my friend Noah Kagan. This course makes a very specific promise and then takes you by the hand and shows you how to accomplish that.
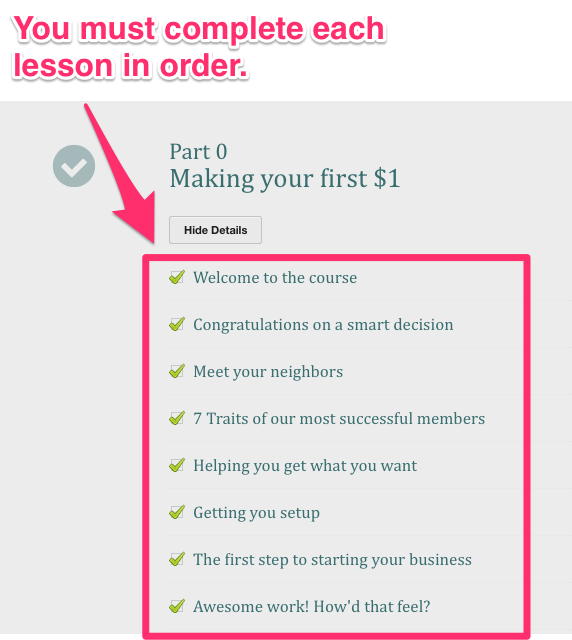
Noah’s course isn’t about learning a bunch of information. It’s about execution, accountability and reaching your #1 goal.
Most people know what they need to do. The problem is DOING IT.
A specific path course helps you to stay out of “learning a bunch of cool strategies” mode and forces you into “you better execute” mode.
When I started his course, I had no business or side income. When I finished a few months later, I was making $8,000 per month on the side.
= Bryan loves specific path courses.
So, when planning out my new course, I knew I wanted to follow that format.
There is nothing wrong with reference courses. I like them and actively buy them myself. But I made a strategic decision to make Get 10,000 Subscribers a specific path course.
Why?
Simply put: It’s the most effective way to help people stay focused, execute and reach their goal.
Step 2: Pick a name for the course.
I’m terrible at naming things.
One time I got a dog. Paid $300 for him. Really nice yellow lab.
1 year later I still couldn’t figure out a name so I defaulted to calling him ‘buddy” (probably a Southern thing). So for the rest of his life his name was Buddy.
When it came to naming my course I couldn’t let the name be “That list-building course thingy.”
So I worked through 4 tasks that helped me pick an effective name for the course.
Task #1: Pick the TYPE of course you want to create.
Having chosen a specific path course, I knew my course name needed to make a very specific promise.
Reference courses can be more broad in name:
- Learn Scrivener Fast
- Blog that Converts
- Master Evernote
All reference courses. All broad names. And they work.
However, a specific path course needs to be more… specific.
Task #2: Make a list of names that are proven to work.
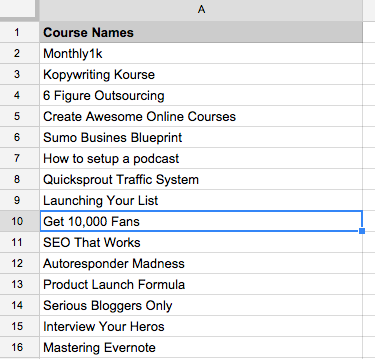
I made a list of the names of every course I had bought or thought about buying in the past.
These were a few of the names…
Task #3: Ask yourself four questions about each name.
1. Do I like the name?
2. Is it short and concise?
3. Can I model the name (steal it) for my course?
4. Does the name clearly tell me what I’ll get out of the course?
Question #4 is very important with any type of course. But it’s especially important with a specific path course.
For example, one the of best courses I’ve ever gone through is Yes Engines by Derek Halpern. But the name of the course is terrible.
I follow Derek closely. I knew about the course. I had even skimmed over some of his sales page. But I had no clue what a Yes Engine was and that it basically taught me an ingenious process for launching products.
I WANTED an ingenious process for launching products. But I had no idea that’s what his product did.
A good name communicates all of that in the title.
For example…
- How to Make Your First Dollar
- Get 10,000 Subscribers
- Product Launch Formula
In less than 5 seconds you know exactly what each of those courses will help you accomplish.
Task #4: Model your course name after the one you like the most.
After analyzing all of the names I could find and asking the four questions listed above, I decided to model the name of Brian Moran’s course Get 10,000 Fans.
My course would be called Get 10,000 Subscribers.
Do I like the name? Yes!
Is it short and concise? Yes!
Can I model the name for my course? Yup!
Does the name clearly tell me what I’ll get out of the course? Yes sir!
Step 3: Storyboard the workflow.
With the course type picked out and the name decided on, it was time to start thinking about the content itself.
Before I started writing any of the content, I needed to decide on a general framework for the course.
What strategies would I teach?
What order would I teach them in?
How many modules would there be?
How could I design the course to give each student a quick win and build momentum into the more difficult sections?
.
My solution was to think of the course as a map.
And each module was a different waypoint on that map.
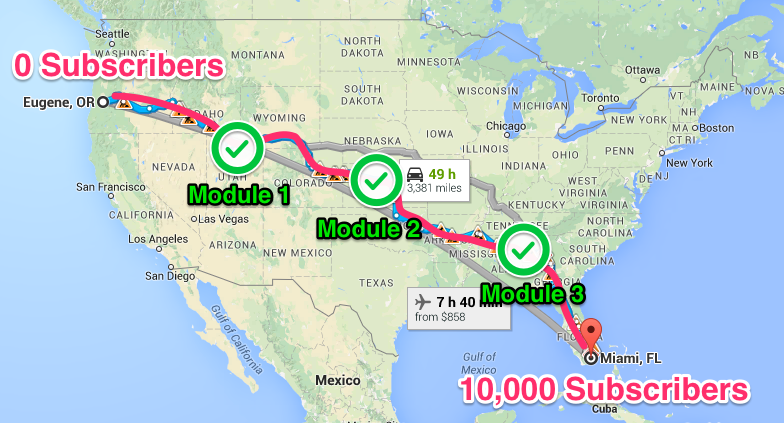
I asked myself the question, “If I were starting a list from scratch and my goal was to get to 10,000 subscribers in 10 months, what would I do and what order would I do it in?”
To answer this question, I first wrote down the four main milestones I would go through as I worked toward my goal:
- 1 subscriber
- 100 subscribers
- 1,000 subscribers
- 10,000 subscribers
Then I wrote out an action plan to work through each milestone.
The result was the storyboard framework of the course.

To create your course framework, answer these three questions:
Question #1: What is the goal of your course?
Question #2: What are the 3-4 major milestones your students will go through as they work towards that goal?
Question #3: What action plan should they follow to work through each milestone?
I’m a visual person. If you are the same, I would recommend working out the answer to these three questions on a white board. This makes it easier to shuffle around your phases and action steps.
Step 4: Create the course content.
Now it’s time to create the actual content of the course.
If you’ve done the work in all of the previous phases, this part will be substantially easier than if you jump straight to this step.
Here is how I created the content for my course:
First, I re-named all my four “milestones” as “modules.”
Example…
The 1 subscriber milestone became “Module #1: Laying the Foundation and Getting your First Subscriber.”
The 100 subscriber milestone became “Module #2: Getting Your First 100 Subscribers.”
and so on…
Second, I relabeled my action items into lessons in each module.
Which means the action items pictured earlier became these lessons in the course.

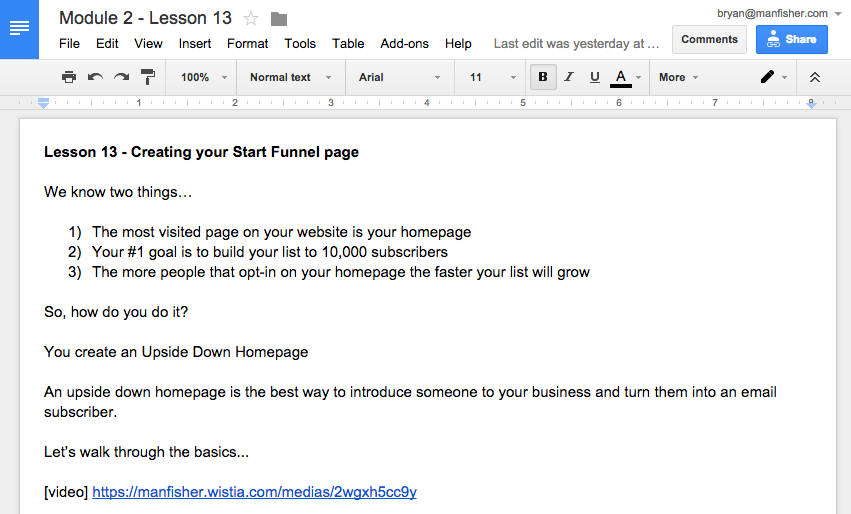
Lastly, I created a new Google doc for each lesson and wrote out the lesson and action items for each one.
Here is an example of one lesson:
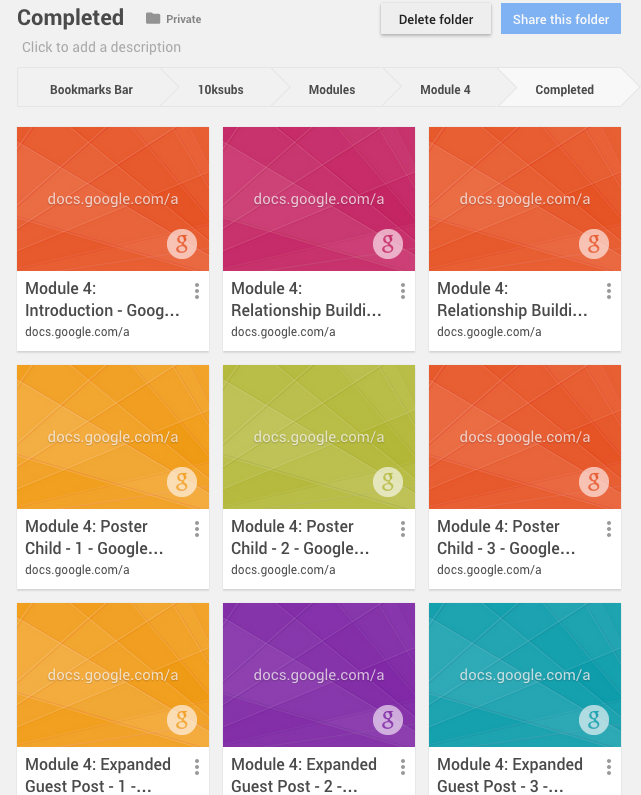
Once I was done, the entire course existed in a series of bookmarked Google docs.
One note:
It’s important to make sure your lessons are small and bite-sized.
For example…
If you’re creating a course that teaches people how to potty train their dog and your first module is called “How to get your dog to listen to you (no matter what)”…
Instead of your first lesson including 16 action items, break it into 4 lessons with 4 action items per lesson.
Remember… momentum is incredibly important for helping your students reach their goals.
Let your students feel the momentum and excitement of completing lessons. Creating huge lessons that take days to finish will cause them to get bogged down and slow their progress.
Here is an example of how I did that:
In Module 4 of the Get 10,000 Subscribers course, I help each student write their first guest post.
I broke that “action item” into 5 separate lessons:
- How to find sites to guest post on
- How to pre-qualify those sites
- How to write the perfect post
- How to pitch the post
- How to structure the post so it converts into subscribers
I could have crammed everything into one gigantic lesson. But by separating it out, it makes it easier for the student to work through.
Once the basic structure was created, each lesson was written in its own Google doc.
Step 5: Set it all up (the tech part).
Writing all of your content will take some time.
That’s OK.
It took me nearly 2 months to finish my course’s content (video scripts, assignments etc.).
72 Google docs and over 30,000 words later, I completed the draft.
Resist the urge to skip ahead.
As Seth Godin says, the cost of changing your mind on the front end of your project is extremely low. Later on the cost increases exponentially, because making structural changes to your course and overall workflow becomes increasingly complex as you get deeper into the process.
At this stage, if you want to add a lesson, all you have to do is create a new Google doc, type a few words and you’re done.
Do the work. Think it through. But don’t procrastinate by trying to make it PERFECT.
How do you plug everything up once you are finished?
This is where a bunch of you get hung up: setting up the tech part of your course.
I’m going to show you two ways to do this:
Way #1: How I did it (because many of you asked)
Way #2: A much easier way to do it
(In the second part of this video Derek Halpern schools me on a MUUUUUCH easier way to set up the tech part of a course. Be sure to watch that part.)
Resource: Zippy Courses, iMember360
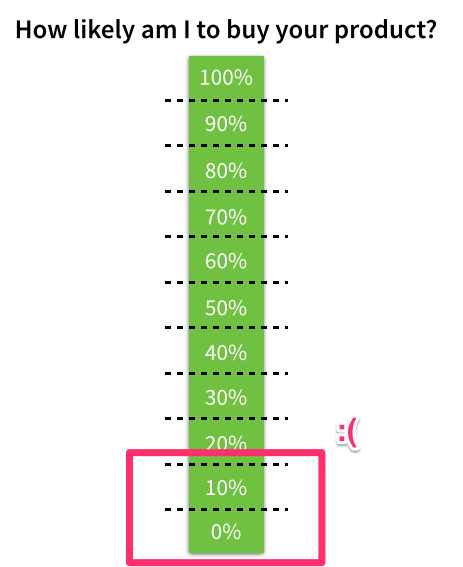
Phase 4: Launch your online course using the PAS Formula.
Coming into the launch of this product, I thought I needed an incredible launch strategy in order to ever have a prayer of doing six figures in sales.
This how I saw things:

This caused me to doubt myself and my ability to have a big launch.
It also left me constantly searching for new shiny objects to add to my launch strategy:
- 3-part video series
- Complicated retargeting campaigns
- Massive affiliates to help me
Will all of these things help you? Sure.
Are they necessary to make six figures from your product launch? NO!
No launch strategy will turn a non-targeted and unengaged audience into a group of ravenous action-takers. No amount of sales videos will magically turn your crappy product that your audience is not interested in into a $100,000 payday.
How can you have a six-figure launch? Spend 99% of your energy in phases 1, 2 and 3.
Then, with whatever energy you have left, follow the plan I’m about to outline to launch your product.
That’s exactly what I did.
I spent 18 months building a loyal following.
Then I spent 3 months researching, validating and building this course.
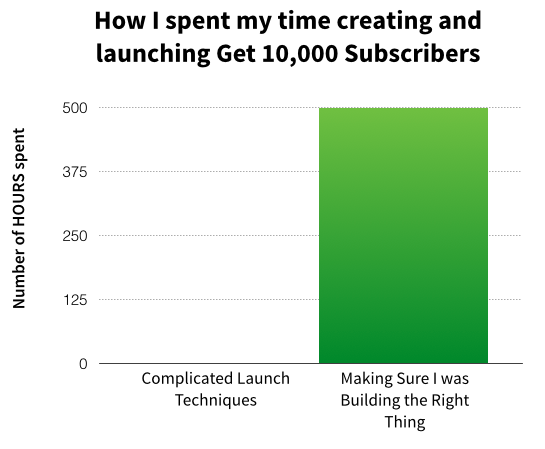
And then launched the course the next day.
Time spent building the course? 500+ hours
Time spent on launch strategy? 12 hours.
Once you have successfully launched your product the first time, you can work on all the sexy stuff (like sales videos and retargeting campaigns) to take your launch to the next level.
But you DO NOT need any of that crap for version 1.0.
What you need for v1.0 is to focus on the 20% of work that produces 80% of the results…
… and that’s what I’m going to show you in the remainder of this article.
Capisce?
OK.
Let’s talk launch strategy.
This is the minimalist launch strategy that I used to sell Get 10,000 Subscribers
I wrote all of my emails within 24 hours of sending them. I didn’t have the time to write them weeks ahead of time.
So as soon as I finished the course, I sat down, scribbled a rough plan out in my notebook and started writing.
As soon as I finished the first day’s email I pressed send.
Then I wrote the next day’s email and pressed send.
Every email was written in real time the day it was due.
A lot of work? Yes!
Slightly stressful? Absolutely.
Required complicated video equipment and retargeting campaigns? Nope. Just good ole-fashioned email.
I could write an entire book about the above strategy.
It’s a compilation of what I learned by going through Yes Engines and CAOC, reading Launch, multiple conversations with Noah, Stu and Jeff and a heavy dose of “making-stuff-up-as-I-went-along.”
But this blog post is getting pretty long so I’m going to hit the highlights.
Then I’ll give you my entire email sequence for you to study.
And in later blog posts I’ll go into more depth on several specific strategies I learned and implemented in this launch.
Let’s jump in.
Step 1: Pre-Launch Sequence
I wish I could say I thought far enough ahead of time to plan this first part out, but I’m not that smart.
I did it by accident.
However…
You should do this if at all possible.
In the 2 months leading up to the launch of the course, I wrote a 6-part blog post series about how to start your business by cold pitching very niche services to small businesses.
(You can see that series here.)
As I got closer to the launch, I began to realize that I was about to have a problem.
For weeks I was telling my readers to start their business by following the Santa Claus formula (cold pitching prospects) and I was about to start selling a product that taught them something that seemed to contradict that (start an email list).
These philosophies aren’t contradictory at all. But on the surface they can appear that way.
On one hand I was telling my readers: Ignore everything else. Find a service you can offer. Make a list of prospects. Pitch them. Sell them.
On the other hand I was saying: Ignore everything else. Build an email list. Sell a product to that list.
Seems like two completely different approaches, right?
The truth is both work well. Both have upsides and downsides.
Building a list and selling $1,000s of product takes some time to put together.
Selling $1,000 of service can be done in a matter of days.
..
So what did I do about this?
Throughout the blog post series on cold pitching clients, many of my readers had started to implement the service-based approach.
And (as expected) many ran into the normal roadblocks people face when they are new to using the approach.
- Rejection.
- Bad market fit with services.
- Targeting the wrong customers…
- … and more rejection. Lots of rejection.
So I used these frustrations and roadblocks to present my readers another option. Another approach that didn’t have the same roadblocks.
Building an email list.
See, with a list you can easily navigate around all of these issues by simply following the framework I laid out in the first three phases of this article.
(Ask your readers what they want and give it to them.)
I used the downside of one approach (the service-based approach) to amplify the benefits of the other approach (list-based business).
That was part 1 of my pre-launch sequence.
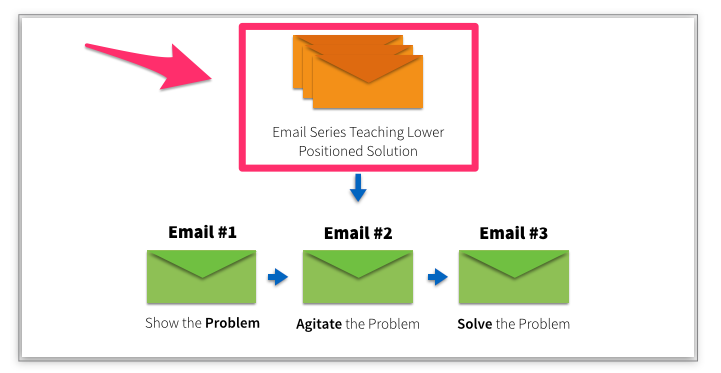
Part 1: Teach an alternate solution with downsides that are solved by your paid product.
How can you do this?
It’s called downward positioning.
Let’s take the example of feeding an infant (we’re about to have a kid so I’ve been reading a lot about this lately 🙂 ).
There are two main approaches to feeding. Neither is right or wrong. Both work.
But both have upsides and downsides.
Approach #1: Let the kid dictate when he eats.
Upside = The kid will be well nourished and your worry level is lower.
Downside = You get ZERO sleep due to waking up every 45 minutes to feed your screaming kid and your schedule is a complete disaster.
Approach #2: Set a strict schedule of feeding every 3 hours (no matter what).
Upside = You’ll get more sleep once the baby catches on and you’ll be able to have some semblance of a schedule.
Downside = You can easily become a dictator who worries more about the clock than your kid’s needs.
..
Personally I tend to lean towards approach #2 more than #1. But I realize the sweet spot is right between the two.
If you were selling a book or training course on approach #2, you could use the downward positioning pre-launch technique. Simply teach in detail how to use approach #1 first.
Highlight all of the best practices of approach #1.
Teach all of the best techniques of approach #1.
And then when you are ready to sell your product that teaches approach #2, use the downsides of approach #1 to highlight the positives of #2.
Something like this…
“Is your schedule a COMPLETE wreck?”
“Are you sick of sleepless nights and ready to get more than 45 min of sleep at a time?”
“Is your crying baby driving you mad?”
“You should try approach #2!”
See how that works?
You could do the exact opposite of this to sell a solution to approach #1.
“Sick of those parents who think their babies run on a clock?”
“Is your baby crying because he isn’t getting enough to eat?”
“You should try approach #1!”
Make sense?
Is this deceiving your audience?
It could be, if you lie to them.
But in this example (and in my launch) I am a huge proponent of BOTH techniques. One day I’d like to create a paid product on the service-based approach.
I want my readers to have a well-rounded view of both.
I want them to know the pros and cons of both.
However, at the end of the day, the better long-term solution for many of my readers is a list-based approach. So I’m going to educate them and, if they are the right fit, encourage them to go down that path.
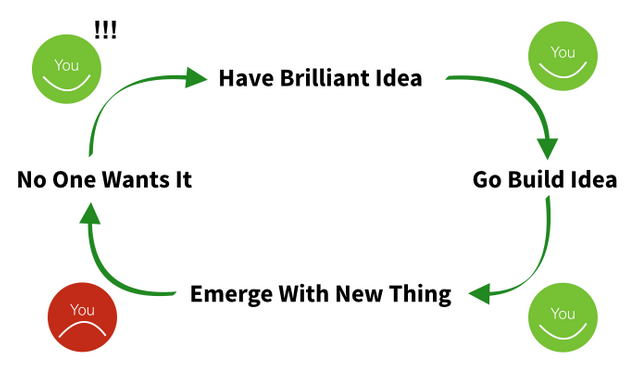
Part 2: Problem, Agitate, Solve
Most people spend 3 months building their product and then emerge from their laboratory expecting that their audience will bang down their door to buy it.
It doesn’t work like that. (Just ask Nathan.)
No matter how good your product is, you have to properly prepare your audience for it…
… and that is what a good pre-launch sequence will do.
Let me show you how I did it.
In Part #1 I did the prep work by positioning the list-building approach as the solution to my readers’ current frustrations and pain points.
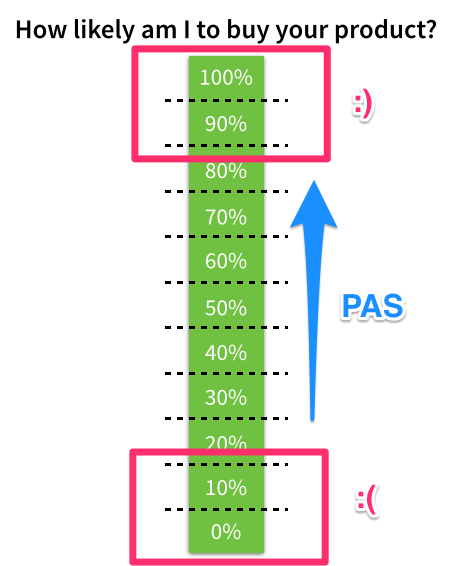
Then in Part #2 I set the stage for a HUGE opening day by using the PAS framework.
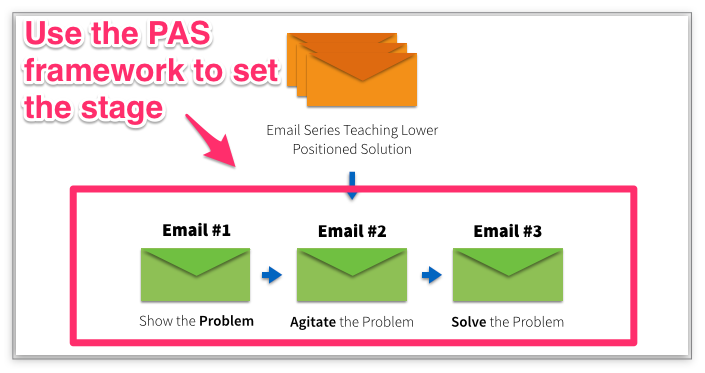
I first heard about the PAS framework from this Copyblogger article. And then when I went through Derek Halpern’s course Yes Engines (highly recommended), he expounded upon it even further and taught me how to apply the framework to a pre-launch series.
What is the PAS framework?
(P)roblem
(A)gitate
(S)olve
Let me explain…
The PAS framework works because it increases your readers’ desire for your product by elevating your product from something they would “kind of like to have one day” to something they “have to have right now.”
I’ll show you an example…
Let’s apply the PAS framework to marriage counseling.
Most any (honest) married couple knows that if they went to marriage counseling on a regular basis, their marriage would improve.
But how many actually do it?
NO ONE!
Why not?
It’s not because they don’t believe in it. It’s because no one wakes up in the morning thinking, “Man I really want to go talk to a marriage counselor today.”
How many of us, though, wish we had a better marriage? Better communication with our partner? On the same page about money? Sex? Kids?
EVERYONE I KNOW.
So, if you were a marriage counselor, the last thing on the planet you want to sell is “marriage counseling.”
What you want to sell is a solution to your clients’ problems.
You want to sell NOT fighting with your spouse, NOT arguing about money, NOT being frustrated about sex.
You can use the PAS framework to do exactly that.
You can take a commodity (like marriage counseling or a course on list building) and transform it from a level 1 desire to a level 10 desire.
How do you use PAS?
Instead of jumping in and talking about your product right away, you are going to use three emails (or videos or podcasts or webinars) to talk about the problem, agitate or amplify the problem even more and then give them a quick solution to their problem.
Once you have done THAT, you will be ready to present an even more robust solution to their problem… your product.
This is how I did that:
Email #1: Problem: In this email I told a personal story and used it to highlight two of the main drawbacks of a service-based business.
Email #2: Agitate: In this email I quickly recapped the first email and then went on to share 5 more mistakes you need to avoid when starting your business. No solutions were offered.
Email #3: Solve: In this email I recapped the first two emails, introduced my solution to the problems and mistakes from the first two emails (building an email list) and then taught a quick strategy that readers could use right then to start building their list.
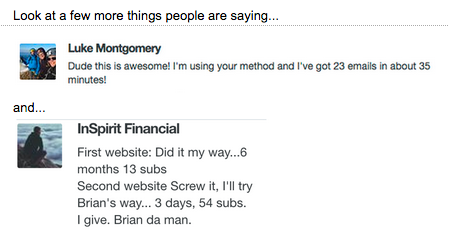
The result of this 3-email sequence was profound.
I received 400+ replies to these 3 emails.
People saying things like…

and…
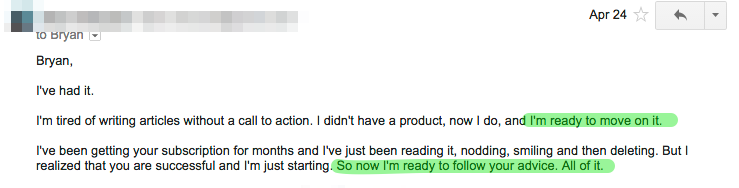
My #1 goal of the pre-launch was to prep my audience and establish a strong desire for the product I was about to launch.
Mission accomplished.
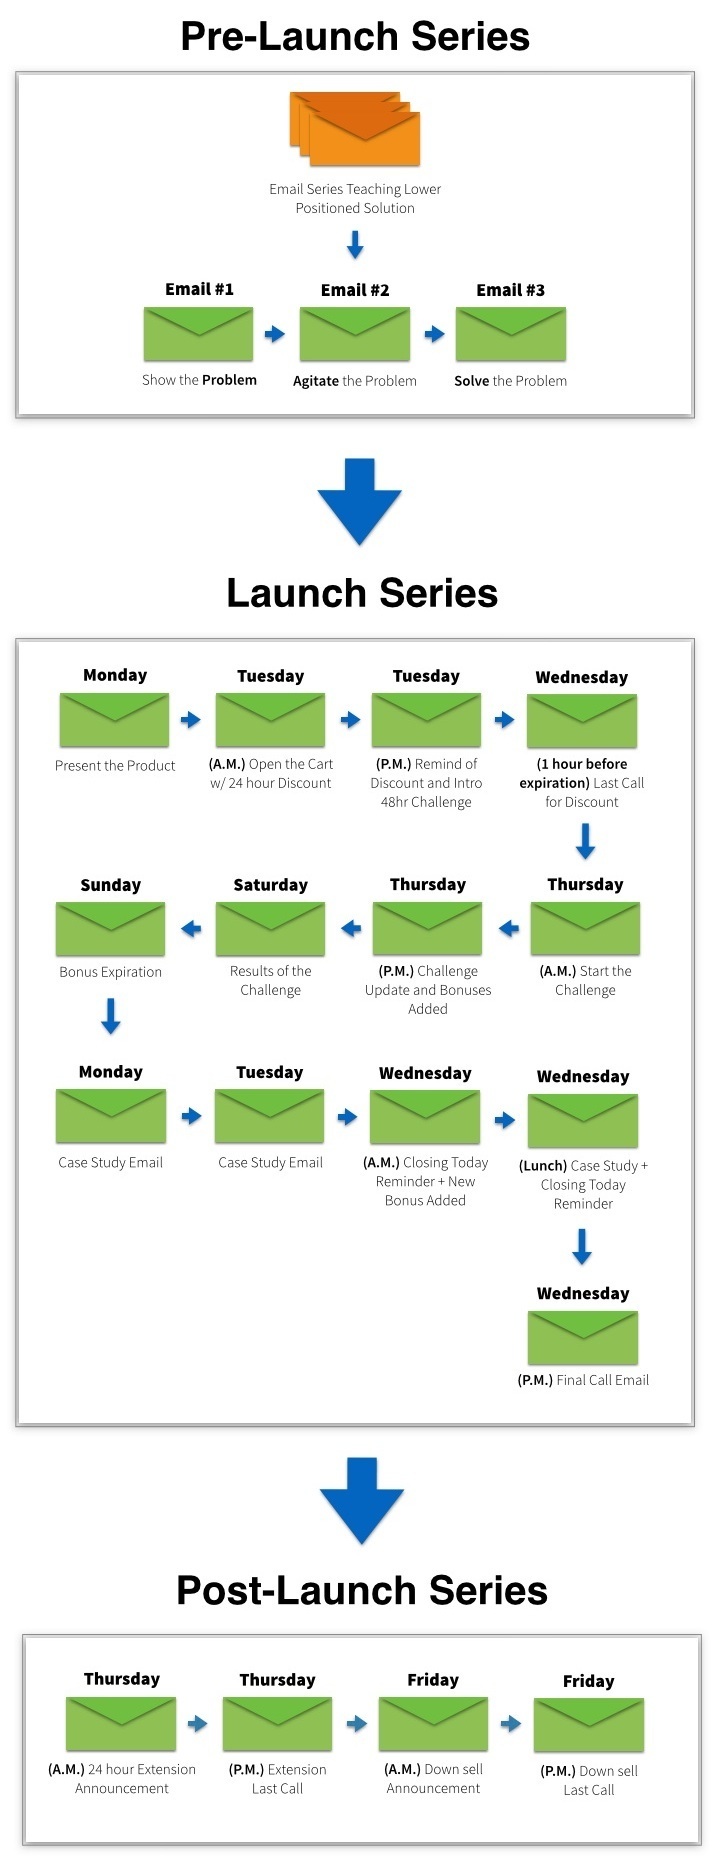
Step 2: Launch Sequence
Now you are ready to launch your product.
This is the 3-phase launch sequence I used to launch Get 10,000 Subscribers.
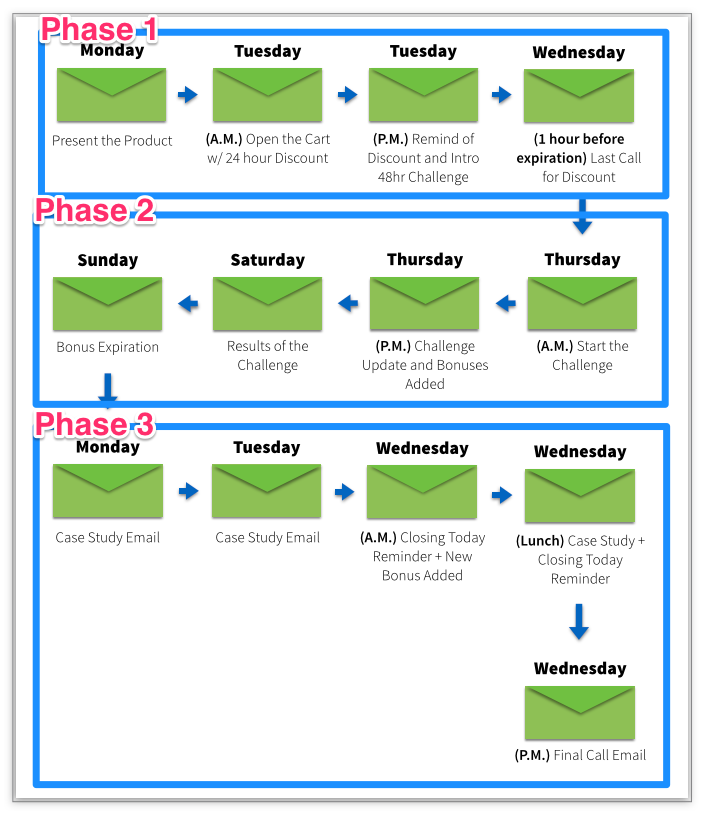
Let’s break it down:
Phase #1: Launch + 24-hour Discount
One of the biggest lessons I’ve learned about sales is that unless people have an incredibly high sense of urgency behind them, they will wait until tomorrow to buy.
I’m that way.
You are that way.
I’ve been meaning to plan a vacation for 4 weeks now. I’ve casually shopped for beach houses to rent. Looked at different cities to go to. And have had at least 5 conversations with my wife about it.
But we haven’t booked anything.
Until today…
While in the middle of writing this blog post we’ve been going back and forth, trying to make a final decision.
Why are we finally making a decision?
The trip is NEXT WEEK!
Ha!
The only reason we aren’t waiting another week to make a decision is because we are out of time.
And this is a BEACH VACATION! Something we reallllly want to do.
Your customers are the exact same way.
Unless they are up against a deadline they WILL NOT pull the trigger.
So your job in the launch of your product is to create as many deadlines as possible. I used three deadlines in my 10-day launch.
The first deadline came 24 hours after the product launched.
I offered a 15% discount to anyone who bought the full-pay package within the first 24 hours.
Here is the initial launch email I sent…

I followed this email up with 2 more emails reminding them of the discount going away at 10 a.m. the next morning.
Guess when the biggest spike in sales happened?
AT THE DEADLINE 🙂

Phase #2: Live Case Study + Mid-Launch Bonuses
A typical launch will have a big spike of sales on day one, a massive lull in sales in the middle and then a big spike of sales on the final day.
The sales graph usually looks something like this…
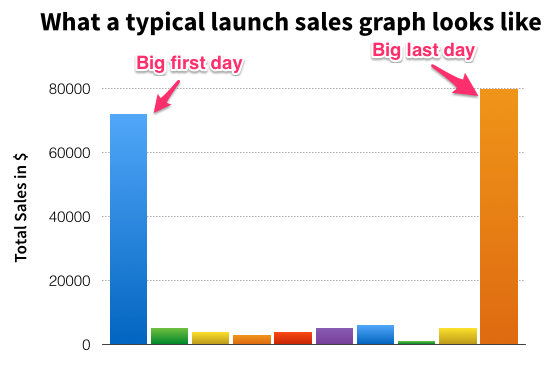
Any guesses as to what causes this?
No deadline in the middle!
Most launches do not have a deadline in the middle of the launch. And as a result people don’t buy.
I wanted to avoid this mistake.
My hypothesis was that if I offered a good legit deadline in the middle of the launch, my sales graph could look something like this:
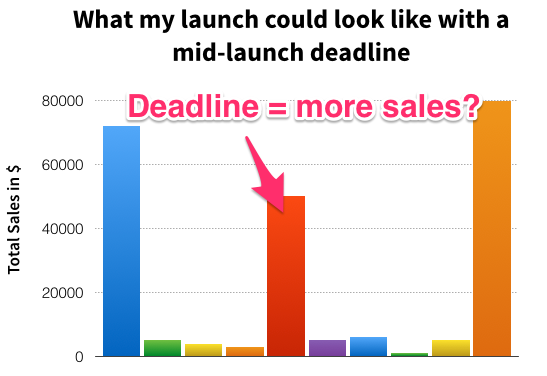
So I did two things in the middle of my launch:
Thing #1: Introduced two new bonuses on day 3 of the launch and expired the bonuses on day 6 (so if you didn’t buy before day 6 you wouldn’t get the bonuses)
Thing #2: Did a live case study in the middle of the launch to bolster people’s confidence in the course and prove the material worked.
I was unsure on what bonuses to offer, so I sent an email to everyone who bought the course in the first 48 hours and asked them this question…
“If I added one more bonus to the course, what would you want it to be?”
The two most popular responses were:
1) Something to help with writing
2) Something to help me execute and overcome my fears
With this info I went out to find products that would help with these two issues.
I ended up negotiating a bulk discount rate for Neville Medhora Kopywriting Kourse (normally $200) and Amy Hoy’s new book Just F’ing Ship (normally $19).
I paid the cost of the negotiated rate ($50 for the course and $12-ish for the book) and gave them both away to anyone who bought before the expiration of the bonuses. (I also gave them to anyone who bought prior to the announcement of the bonuses.)
This created a SECOND deadline in the middle of what would have otherwise been a trough of inactivity.
The results?
$38,000 in sales on the day the bonuses expired.
Phase #3: Testimonials + Launch Close
The 3rd and final phase of the launch is the close of the launch itself.
Rewind for a minute…
The general workflow for someone to buy my course looked like this:
- Get an email
- Click the link
- Go to a sales page
- Click the “buy now” link on that sales page
- Enter payment info
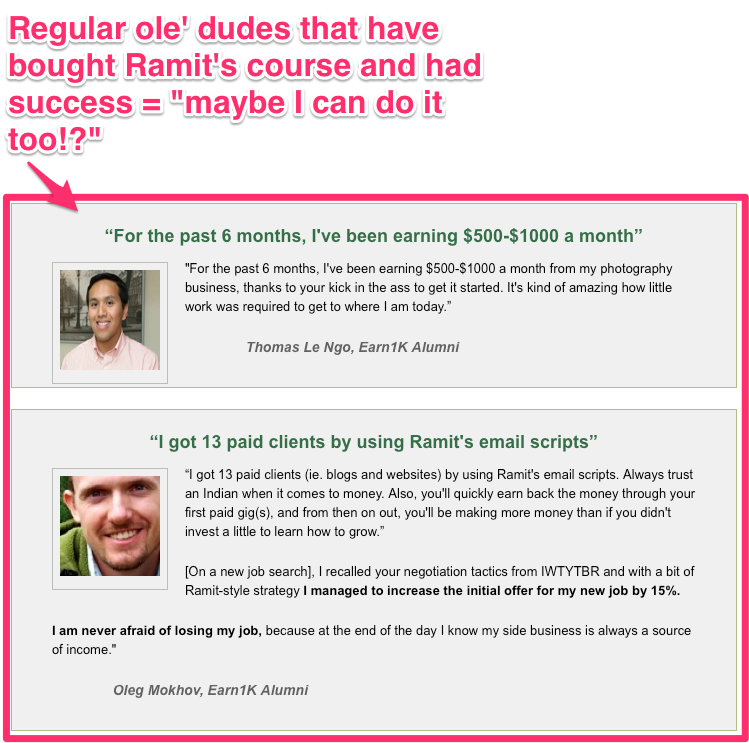
One of the KEY parts of that process is the sales page itself. And one of the key parts of any sales pages are the testimonials you put on the sales page.
They provide proof that your product works for real people and bolster the claims you make on your sales page by showing the actual results from your students.
Here is an example of testimonials from Ramit Sethi’s sales page for one of his courses, Earn1k:
My problem was this…
I wrote my entire sales page the afternoon before the launch and I ran out of time to get testimonials on that page.
So I had to make up for that.
I had to SHOW my readers and prospective customers that the material in the course worked.
My solution?
The last 3 days of the launch were FILLED with stories of people who I had coached and consulted with and people who had read my material and experienced crazy results.
Here is an excerpt from one of those emails:
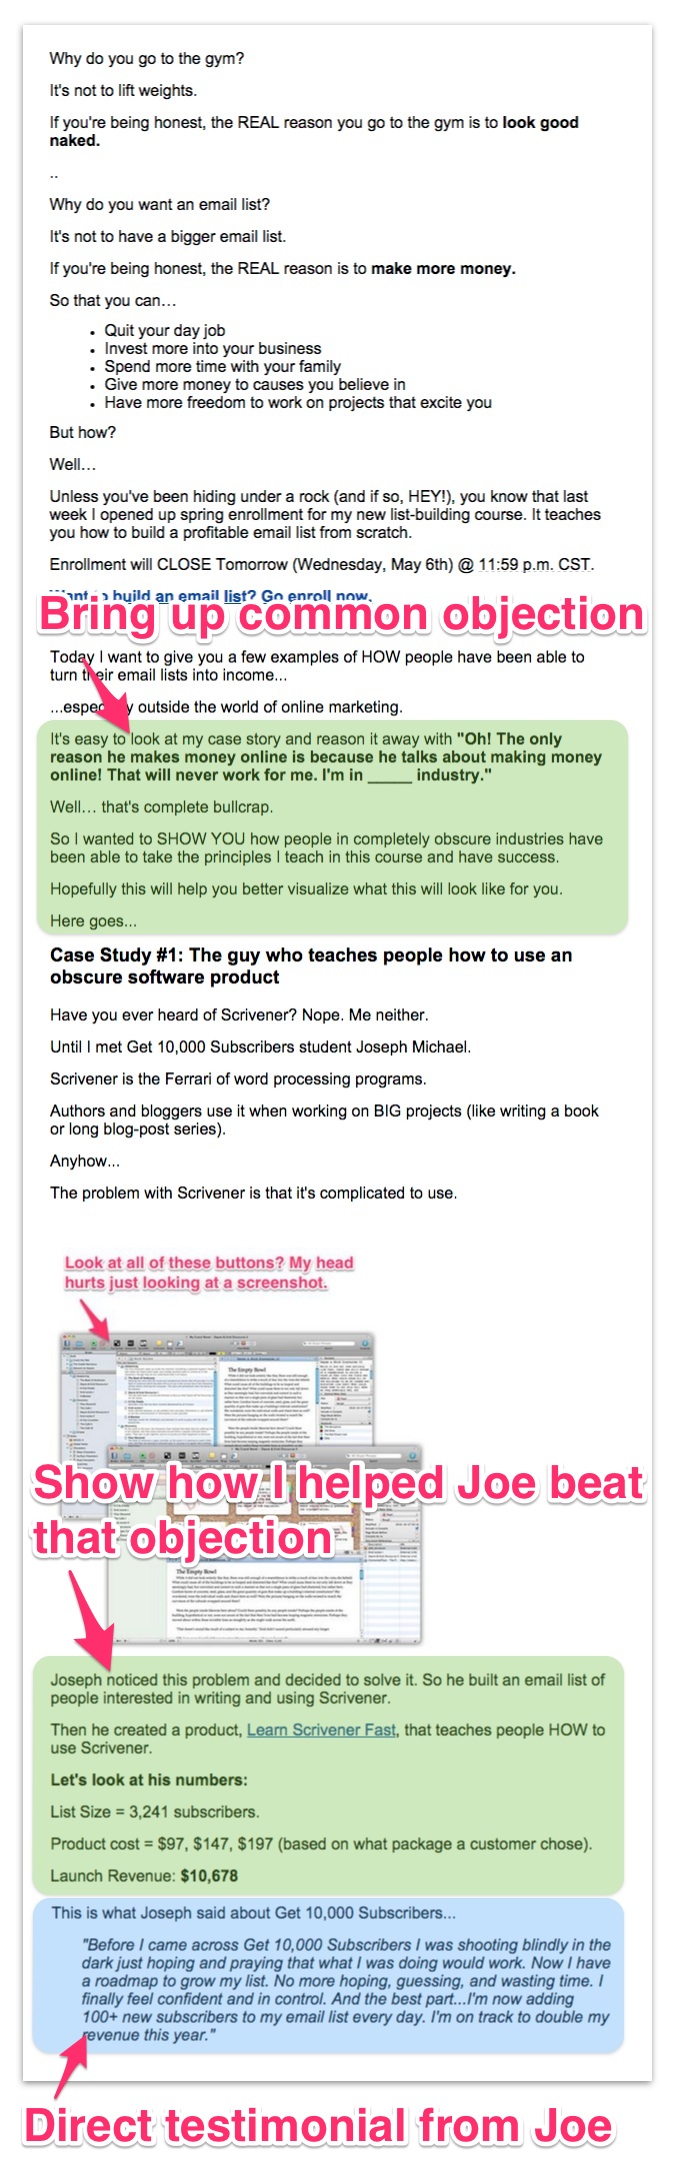
One of the key things I did in these emails was to take screenshots of the results that people who had bought the course just days earlier were posting in the community.
Like this…
This series of testimonials and live results from students will increase the trustworthiness of you and your course in the minds of your more skeptical readers.
The final push (closing the course)
After I closed out the mid-launch bonuses, it felt like my list was tapped out.
I had been sending 10x the email I normally send. 100+ people had bought the course. And the day after the bonuses only 5 people bought.
It felt like everything was over.
LOL.
It was only starting.
Between Monday and Friday of closing week I would go on to more than DOUBLE the number of sales of the course.
And it all happened because of deadlines.
The “last” deadline was closing the course itself.
After all of the case study emails had gone out it was time to shut the course down.
So on Wednesday, May 6th, I sent three emails reminding people that the course was closing that day.
Email #1: Went out at 6 a.m.
It was a simple reminder that the course would be closing at midnight that night.
At the last minute I also added two new bonuses for people who bought then. (In hindsight, this was probably not necessary as the closing of the course itself already created an extremely heightened sense of urgency.)
Email #2: Went out at 2 p.m.
This email reminded everyone of the close and also gave one last case study.
I made sure to pick a case study for this email that was relatable for beginners. So I told the story of how one Videofruit reader was able to quickly grow his list to 3,500 subscribers and launch his product to $61,000 in sales.
Email #3: Went out at 8 p.m.
This email was short and sweet.
It was the final call “buy it now or never” email.
This is the email that produced the single most sales of the entire launch.
The results of Phase #3?
Just over $60,000 in sales in the final 3 days of the launch.
Step 3: Post-Launch Sequence
The 3rd and final step of the launch sequence is what happens AFTER you close.
Most people close their cart and call it a day.
That is an extremely bad idea.
In the middle of my launch, I got an incredibly important piece of advice from my friend Jeff Goins.
That piece of advice produced just over $48,000 of sales AFTER the cart had closed.
When I went to bed on Wednesday night (the day the cart closed) sales were at $172,700.
When I went to bed Friday night sales were at $220,700.
All from this one simple strategy.
What was the strategy?
🙂
Want me to help with your next launch?
Truth is this course launch strategy and the downsell strategy I teased above work extremely well. But can be intimidating to do yourself.
It’s easy to get lost in the details and stress out over every detail, never knowing if you’re doing the stuff that actually matters.
I’d like to help you. I’ll plan out your entire launch for you, give you a step-by-step action plan and coach you through the process.
If you want to see what that would look like, click the link below.
