Ever had this conversation before?
Be honest…
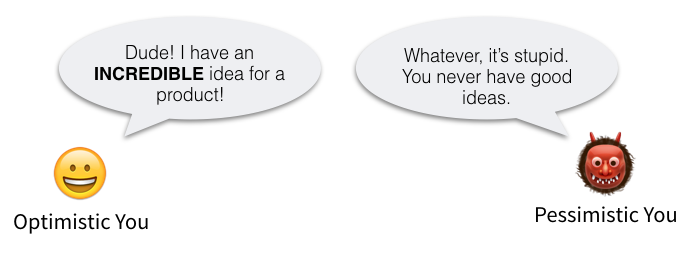
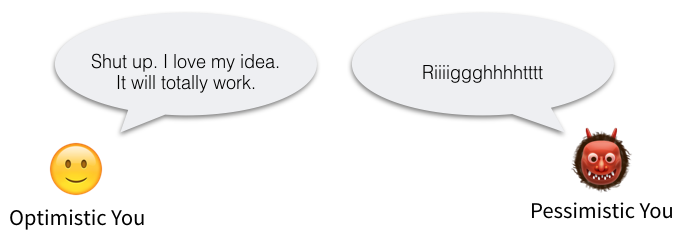
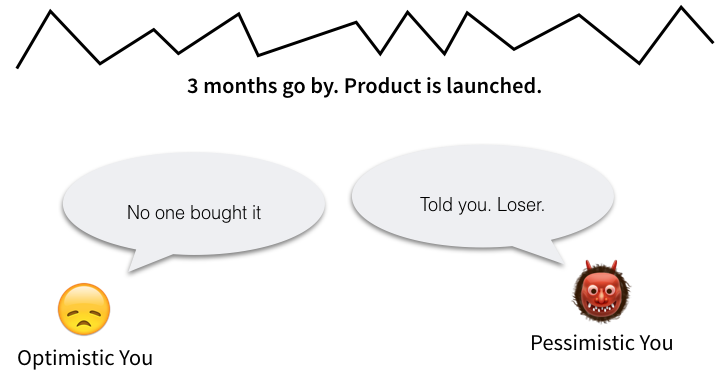
What went wrong here?
The idea was freaking brilliant and you made an incredible product.
Why didn’t people buy it?
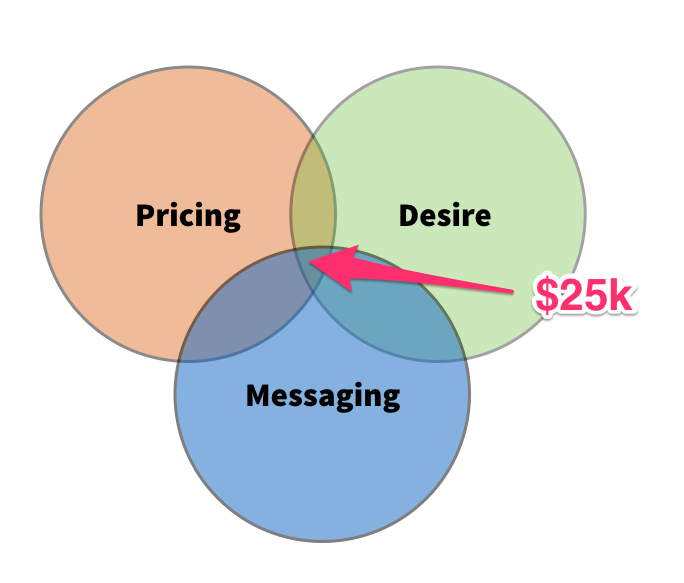
There are three things that have to be nearly perfect for a product to sell:
1. Pricing
2. Desire
3. Messaging
The pricing has to be on point. If you charge 10x more than you should, no one buys because you’ve out-priced the market. Price it 10x too low, and people are skeptical because it’s too cheap. Either way, you’re hosed.
Your audience has to have an intense desire for the product you’ve made. Does it solve an urgent problem in their lives? If not, you’re screwed.
Is the messaging right? Are you talking about the problem and your solution in a way that makes sense to them and resonates with them? If not, yup, you’re screwed.
Here is a fun Venn diagram that shows how this works.
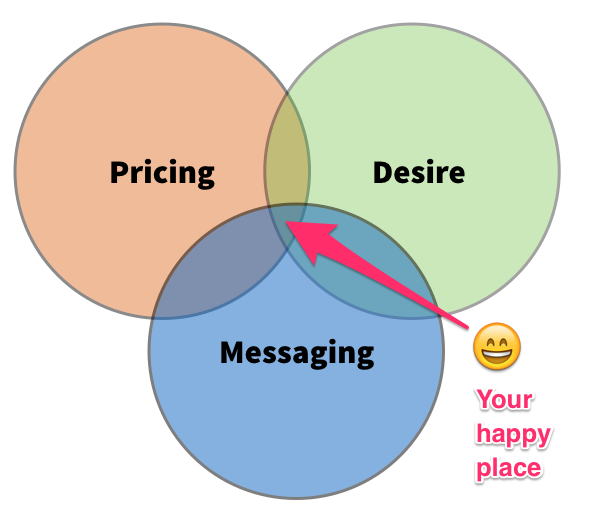
Get one of these out of whack and poof! Stupid Pessimistic You thinks he’s a baller. (He’s not. Optimistic You is just lazy and skipped steps.)
So, how do you make sure these three things are correct?
This is how…
Pre-sell the product.
Before you create anything, go through an extensive pre-sell validation process to refine your pricing and messaging and make sure there is an intense level of desire for the product. But most people get lazy and skip this step.
And that’s why most people’s products flop.
This is especially true for those of you who have successfully launched a product in the past. You think you are invincible and know everything. You don’t. Do your homework or suffer.
Don’t skip this process. Don’t be that guy.
I’ll help you.
🙂
…
Today we’re going to do two things…
Thing #1: I’m going to walk you through my journey of validating the first product I ever sold on the VF blog. It was called The Vault. Some of you old-timers might remember it. For those of you who are newer, the Vault was a weird little product.
It was a resource that contained 3 things: 1) list of my recommended contractors; 2) collection of my swipe files; and 3) video-recorded workflows of how I outsourced and interfaced with the contractors I used.
When I created and launched this product, the VF email list was right around 6,000 subscribers.
What happened? Crazy stuff. It sold over $25,000 worth in the first week.
This happened because the messaging and pricing were on point. And the desire was intense.
And THAT was because I spent 4 weeks in an intense validation process before creating the product.
You’ll see how to do the same thing.
Thing #2: Today we’re releasing a BRAND-NEW template into Slingshot, the Product Validation Template!
If you want me to take you by the hand and show you everything you need to do to properly validate and pre-sell your product (you’ll get at least $1k in pre-orders), this template is for you.
If you’re sick and tired of creating products that flop or being unsure about how to properly price, package and position your product, this template is exactly what you need.
If you’re unsure whether your audience has an intense desire for your product, yup, this template is your soul mate.
There are 37 total steps you need to go through to properly pre-sell and validate your product, and each one is meticulously detailed for you in Slingshot.
Here’s a quick overview of how it works.
…
Alright…
Let’s jump into the validation methodology we used for the Vault, Get 10,000 Subscribers and our latest product, Slingshot.
There are 6 major phases.
Game time!
Phase #1: Create a product your readers are desperate to buy
My mother-in-law swears that she invented the slogan “Just Do It” before Nike did. It was HER idea, not Nike’s. So, when Nike made it the centerpiece of an entire global marketing campaign, she immediately said, “They STOLE MY IDEA!”
But the truth was she wasn’t the head of an ad agency, she didn’t run a business and she had no way to actually use a slogan. It was just a random idea.
Random ideas are worthless.
What you need in order to turn your blog into a sustainable business is the Perfect Product Idea.
- The Perfect Idea is extremely focused.
- The Perfect idea is something only you can make.
- The Perfect Idea is something that your audience will beat down your doors to buy.
How do you find the perfect product idea?
For most businesses it’s a guessing game.
For a blogger it’s not. For a blogger it’s a process of analysis and testing.
This Product Validation Process allows you to sidestep all of the B.S. that traditional businesses go through to figure out what to create in order to get customers.
Let me show you exactly how to come up with your perfect product idea.
Step 1: Make a list of your most popular blog posts
Note: If you haven’t written at least 10 blog posts, I suggest doing that first. Use the Question Strategy to create your first 10 posts. You can complete this within the next 30 days.
To do this, log into your Google Analytics account.
Then navigate to Behavior > Site Content > All Pages
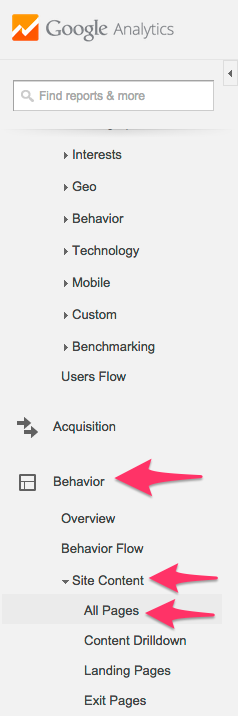
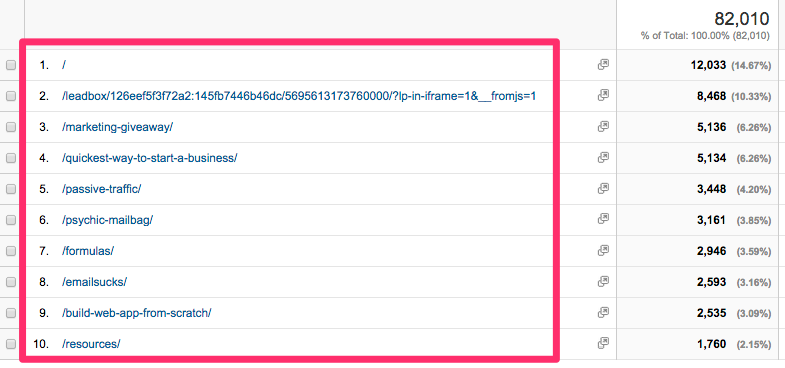
Once you click on All Pages you will see a list of the most popular pages on your site.
Next, create a Google spreadsheet.
Label the first 5 columns: Category, URL, Traffic, Social Shares, Click Rates, Opt-ins and Notes.
We’ll call this our Perfect Product Idea spreadsheet.

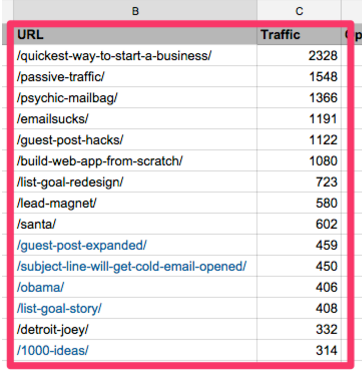
Next, enter the URL of the top 10 most visited blog posts from your Google Analytics account.
Be sure to exclude your root domain and any unrelated pages that might be shown.
When finished, your spreadsheet should look like this:
Step 2: Make a list of your most engaged with blog posts
There’s a few different methods you can use to decide which of your blog posts receive the most engagement from your audience:
Method #1: Which posts have the most social shares?
Method #2: Which of your emails regarding your posts have the most clicks?
Method #3: Which of your blog posts have the most comments?
Method #4: Which of your content upgrades are the most popular?
You can use as many of these methods are applicable to you. The main goal is to have a list of your most engaged with blog posts by the end of this step.
Method #1: Which posts have the most social shares?
The best way to find how many social shares your posts are getting is through a search on Buzzsumo. Simply type in your website in the search bar…
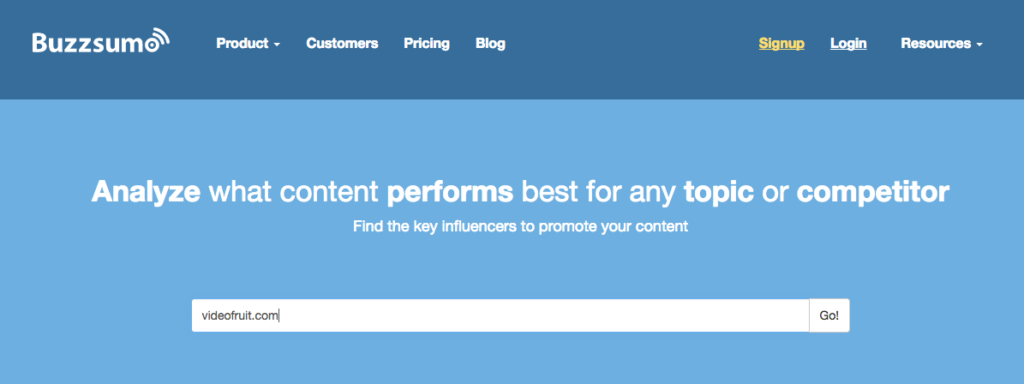
And then look through which of your blog posts got the most social shares.
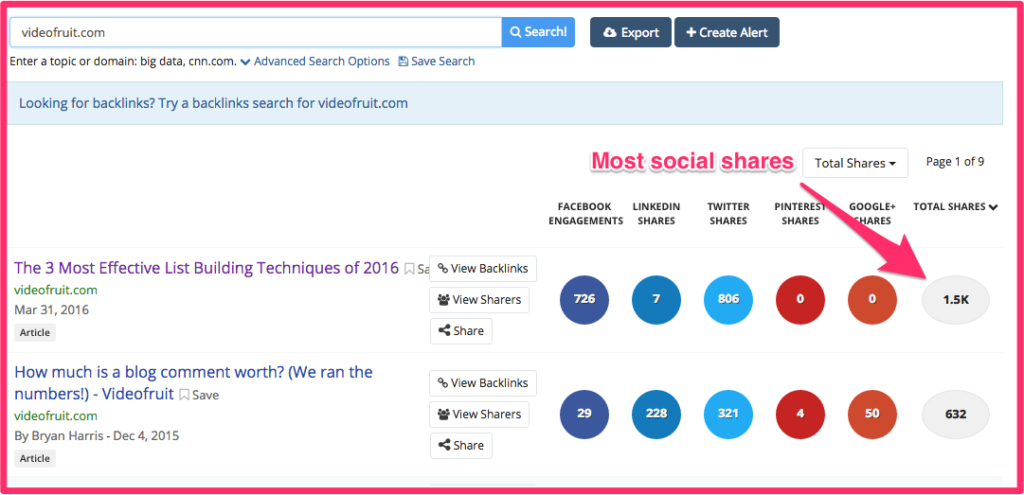
Input your top 2-3 posts into your spreadsheet.
Method #2: Which of your emails regarding your posts have the most clicks?
Another way you can measure engagement in your posts is to see which of your email broadcasts get the most clicks.
You’ll just need to log into your email service provider, go through your emails and record what your click-rate was for each email sent about a blog post. Most email service providers have this percentage easily viewable.
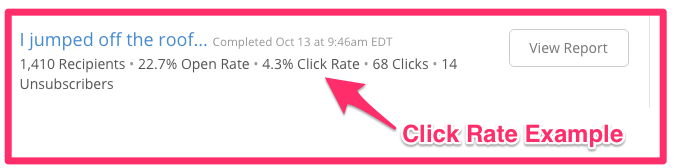
Once you have identified your emails with the highest click through rates, add the blog post that the email was referencing to your list.
Method #3: Which of your blog posts have the most comments?
This method works great for some and not as great for others. It mostly depends on if you get a high number of comments on your posts. If you are only getting one or two comments per post, I would skip this method. However, blog post comments can be a useful way to see which of your posts are the most engaging and helpful, if you do have a lot of commenters.
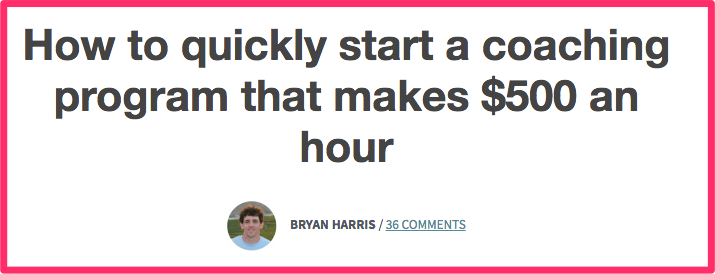
Take a look at two of my previous blog posts. You can see from the comments, my audience is much more interested in launching products than building a coaching program (93 comments compared to 36 comments on the following two posts):
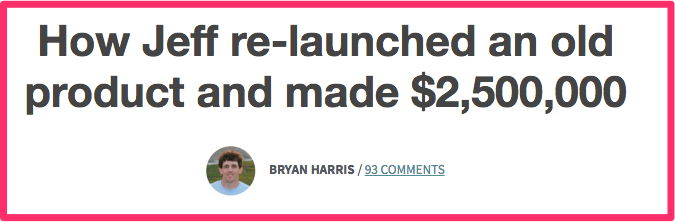
If you have an audience that is highly engaged via commenting, then go through and see which posts have the post comments. Add these posts to your spreadsheet.
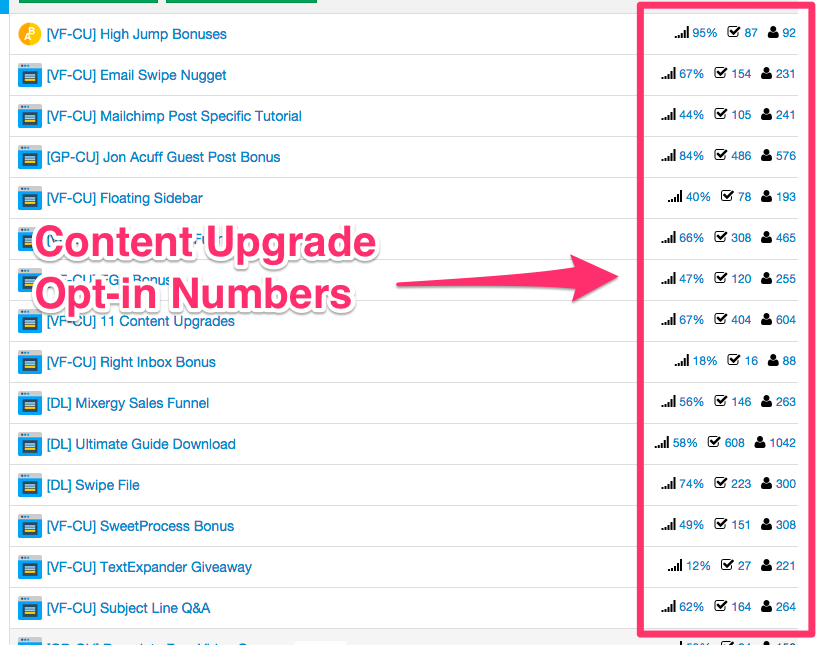
Method #4: Which of your content upgrades are the most popular?
Now, if you have content upgrades added to your blog post, then add to your spreadsheet the 5 most popular content upgrades on your blog.
You’ll probably discover that your most popular content upgrades are also your most visited posts. However, that isn’t always the case. If you come across one that isn’t already listed in your spreadsheet, add it to the list.
Then, beside each entry, record the number of people who have opted into each content upgrade.
The easiest way to get your content upgrade opt-in numbers is to log in to your LeadPages account and record the data from the dashboard.
Step 3: Analyze the common elements of each post to find topical overlap
Now that you have a grasp on what your audience likes, it’s time to find the common elements.
Next to each entry in your spreadsheet, fill in the category that the article covers.
When finished it should look like this:

Now, create a new tab inside of your spreadsheet and name it “Data Overlap.”
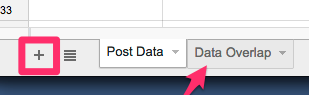
Inside of this tab, list each of your categories in a separate column header.

Then, enter the totals from the “Traffic” and “Content Upgrade” fields for each article
Lastly, at the bottom of each column, calculate the total of all of the articles in that category.
When finished it should look like this:
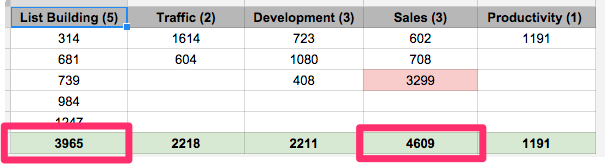
What these numbers show you are the topics that your audience has read, engaged with, and opted in to the most.
Think of each of these posts as being micro product tests. This is incredibly valuable information and the basis for finding your Perfect Product Idea.
Now, it’s time to pick which category in this spreadsheet to focus on.
A few questions you can ask yourself to help make your decision easier are:
1. Which category received the most engagement?
2. Which category was most consistent in getting the audience’s attention?
3. Which category does your gut tell you would be the most successful?
From the spreadsheet example above I chose List Building.
Step 4: List out product ideas from your top category
Now you need to turn your category into a list of ideas for a product. If you don’t know what kind of product to create, here are a few ideas:
• Create an online course
• Create a mastermind group
• Offer services to help people with the topic
• Host a live event
• Create a coaching program
• Create an e-book, app, or software product.
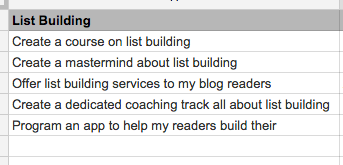
Let’s take the List Building category from the above example.
We could:
• Create a course on list building
• Create a mastermind about list building
• Offer list-building services to my blog readers
• Host a live event about list building
• Create a dedicated coaching track all about list building
• Program an e-book, app, or software product to help my readers build their lists
Maybe the topic of your blog is healthy recipes, and your audience is most interested in weekly meal planning.
You could:
• Create an online course on meal planning
• Create a weekly group where you plan meals together
• Offer meal planning / shopping list services to your blog readers
• Host a live event regarding the topic of meal planning
• Create a coaching / accountability program where you help individuals create customized, healthy meal plans for weight loss.
• Create an e-book, app, or software program to help readers with their meal planning
The question you need to ask is:
How can you turn your most popular category into a product?
Create a new tab in your Perfect Product Idea spreadsheet and name it “Product Hypothesis.”

In this tab, list out every product idea that you can think of for your category.
Make sure your ideas are a mixture of both products and services.
Tip: It’s also good to go to the blog posts written in the category and read through the comments to see what your readers are asking for clarification on and are having trouble with.
If you don’t have many comments on your blog, go to your contemporaries’ blog posts on similar subjects and look at their comment sections.
Once you have brainstormed ideas for your category, it should look like this:
Step 5: Pick one product idea to test
At this point, you have analyzed your most popular blog posts, identified the topics that your readers are most interested in and come up with a list of product ideas for each.
Now, you need to pick one product idea to test.
Ask yourself these three questions to help make your decision:
1. Which product idea excites me the most?
2. Which product would be the most helpful to my audience?
3. Which product has the most earning potential?
Don’t overanalyze this step. Spend no more than 72 hours deciding on your product idea. Remember, you’re going to validate it before you build it, so you aren’t committing to it 100% right now.
Just go with your gut.
Then…pick your favorite.
Want to watch the process of picking a topic idea live, in action? Check out this video of a recent webinar call where I actually go through the process of picking a product idea live.
Step 6: Create a detailed product hypothesis
Once you’ve picked your product idea, I want you to come up with a more detailed product hypothesis for the product. That’s really just a fancy way of saying to write up a Google doc, describing what would actually be included in the product.
Here is a screenshot of our product hypothesis for 10ksubs.
Inside the Product Validation Template you’ll get our product descriptions for both 10ksubs and Slingshot.

Once you’ve finished your product hypothesis, it’s time to move on to Phase two.
Phase #2: Validate the product idea
This is where most people get lazy.
MOST people go from “I have a cool idea!” straight to creating the product.
That is a huge mistake.
In order to build a product that your audience will go crazy over, you first have to test your product idea to determine if they will actually pay you money for your solution to their problem.
To do that, follow these three steps:
Step #1: Create a focus group.
Step #2: Get feedback on the product.
Step #3: Ask for the sell.
Let me show you how I did this for my very first product I ever created. It was called “the Vault” and was a list of all the contractors and processes I used in my first few years of business.
Create a focus group to test the product
After coming up with the idea for my product, I tested it by sending out a series of emails to a small segment of the Videofruit email list.
That small segment is your focus group.
They will tell you if your product idea is worth pursuing by giving feedback and pre-ordering the product (more on this later).
If you use content upgrades, creating your focus group is easy. Just segment your list by identifying the readers who downloaded the content upgrade for blog posts in the category of your product idea.
For example…
Before launching the Vault I offered a content upgrade of 150+ Landing Page Templates.
Any time someone downloaded those templates, they were required to enter their email address which allowed me to identify exactly who was interested in that topic.
Since the Vault included 100s of templates, I used the 150+ Landing Page Templates downloaders as the focus group for the Vault.

However, if you don’t track the exact individuals who download content upgrades, you can create a similar segment by tracking who clicked the content upgrade link in the broadcast email for that blog post.
This is easily done with any major email service provider like MailChimp, Covertkit, or AWeber.
Ask the focus group to give feedback on the product
Include only 50 people in your initial focus group.
Follow this 3-email sequence to ask them for feedback.
• Email #1: Ask for their opinion.
• Email #2: Send product details.
• Email #3: Answer questions and ask to buy.
This email campaign is designed to get each focus group member to give you feedback on your product, answer any questions they may have and then pre-order your product.
The ultimate gauge of the validity of your product idea is whether or not your biggest fans will pay you for it before it exists.
Let’s walk through this email campaign in detail.
Email #1: Ask for their opinion
The purpose of your first email is to get their permission to talk to them about your product.
Once you have identified your focus group, send each member this email from your personal Gmail account (no automation).
Here is the email I used (and what you should copy)…
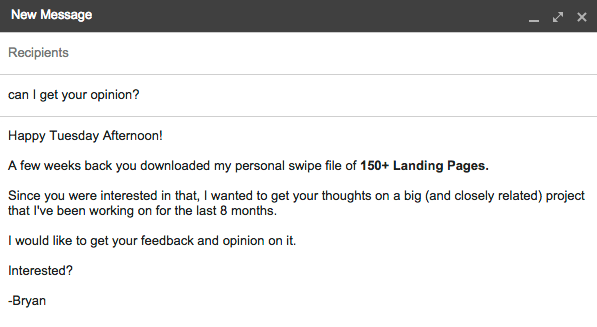
Email #1: Get their permission
Results: 36 of the 50 people I emailed said they would like to participate.
Email #2: Send product details
The purpose of this email is to get them to give feedback on your product.
To do that, you have to send two pieces of information: 1) a link to a detailed description of your product; and 2) a link to a form where they can leave feedback.
Here is the email I sent.
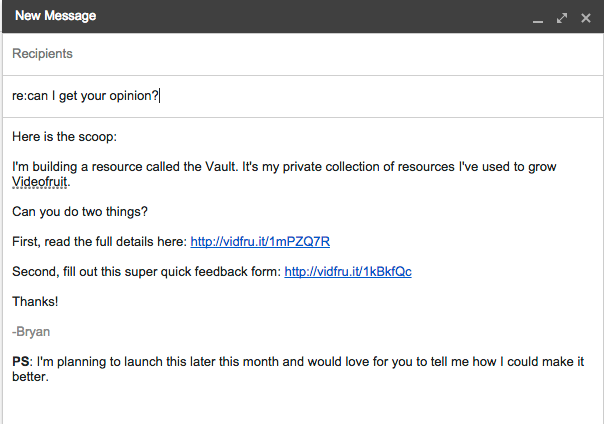
Email #2: Deliver the info
You product description should be included inside of a Google Doc and be linked directly from your email. DON’T put the full product description in this email. It’s too much information and will overwhelm the reader.
The feedback form should ask these three questions:
1. Do you want to buy this product?
2. What is the #1 thing that made you want to buy?
3. What do you wish this product had that it doesn’t?
By getting real feedback from real customers, the sales pitch you use in your actual product launch will answer all potential objections and highlight the key features that you already know draw in your ideal customer.
Results: 22 of 36 people that initially agreed to give feedback actually left feedback.
Email #3: Answer questions and ask for the sell
This is the most important step.
Feedback from 22 people can be extremely confusing. To cut through the clutter, I do not pay attention to the feedback of anyone who did not want to buy the product.
If, after reading your blog, downloading your free bonus content, being personally invited to participate in the development of a new product…
…if after all of that they still don’t want to buy from you, they are NOT your ideal customer. Ignore them.
Instead, focus 100% on those who are interested. Those are your core customers and the people you want to make happy.
After receiving feedback from your focus group, you need to do two things:
1. Hide the results of anyone who said “No, I don’t want to buy.”
2. Immediately answer the questions of and send a checkout link to those who said “Yes, I want to buy.”
This is an email I sent to a member of my focus group after they expressed interest in buying my product:
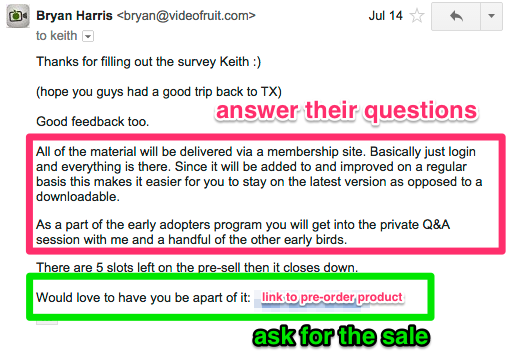
Email #3: Answer their questions and ask for the sale.
This email does two things: 1) answers their questions; and 2) gives them an immediate opportunity to buy the product.
Do NOT be shy about asking for the sale at this point. They said they wanted to buy…so let them.
Results: 13 of the 22 people who gave feedback said they would buy the product. 6 of them actually bought.
Phase #3: Determine if your product idea is a success
10%.
That’s the number you are looking for.
10% of the people in your focus group should buy the product.
(If you are selling products that cost more than $400, adjust this number downward. And if you’re selling really low-priced products, less than $50, adjust it upwards.)
How did I come up with 10%? My thinking was that if I sent an email to a highly targeted group of 50 people and I couldn’t get 5 of them to buy a product they had already shown some level of interest in, then it would be nearly impossible to get 10,000 people who hadn’t shown interest in the product to buy it.
Once your first round of focus group testing is complete, analyze the results to determine if 10% of the participants bought.
What if I miss my goal?
If less than 10% of your focus group buy your product, that doesn’t necessarily mean the product is a failure.
There could be any number of problems:
1. Your sales copy could be bad.
2. Your price could be too high (or too low).
3. You could have taken the wrong approach to solving the problem.
If you find yourself in this situation, I suggest testing each one of these potential problems with separate focus groups.
For example…
If your results come back and only 3% of your focus group participants bought, then re-rewrite your sales copy by using the questions and concerns that your first group expressed in their survey.
In my case, one question that came up over and over again was:
“How are you going to protect the contractors in Rolodex from getting overwhelmed and flooded with requests?”
So, in my second round of testing I answered that question.
The results? A 20% increase in sales with focus group #1 vs. focus group #2.
Repeat all of the above steps (from start to finish) until you hit on a product with a 10% conversion rate in your focus group.
What happens when I hit my goal?
Do it again.
Yes, once you hit your 10% conversion rate, you need to do it again.
I recommend using a total of three focus groups to validate your results.
For example…
When I was validating the Vault, I first validated it with a group of 50, then with a group of 100 and lastly with a group of 250.
The first group converted at 10%.
The second group converted at 11%.
And the last group converted at 14%.
Using three separate groups ensures that the results you are getting are accurate and that one or two outliers aren’t skewing the numbers.
It also allows you to collect a wealth of data on the product itself by talking to actual paying customers.
Once you have come up with your product idea and validated it with three separate focus groups, it’s time to build the product!
Phase #4: Launch the product and make money
Ok, the hard work is done.
Pysch!
Finding a great idea and validating that idea is just half the battle. Now it’s time to launch the product to your audience.
The most effective way to do this is to email your readers and tell them about it.
However, just shooting them a quick email with a “buy now” link is a great way to annoy them and ensure the launch is a failure.
You have to warm them up!
My wife and I went on a trip to Costa Rica. We were driving through the middle of nowhere when we began to notice signs for this little restaurant, Toad Hall.

TOAD HALL!
We hadn’t seen a car for over an hour and then all of a sudden we began seeing signs for Toad Hall.
5 miles out: “Best Tacos in Nuevo Arenal!”
4 miles out: “We’re nice people!”
3 miles out: “You’ll love our view!”
2 miles out: “Don’t miss Toad Hall”
1 mile out: “Toad Hall on right in one mile”
0.5 mile out: “Welcome to Toad Hall…not really. We’re 0.5 mile on the right!”
0.1 miles out: “Park here and visit world-famous Toad Hall!”
Guess what we did?
We visited Toad Hall.
No other restaurant in Costa Rica did this. All of the OTHER restaurants relied on the sign hanging in front of their building to capture my attention.
All of the OTHERS were working under the assumption that as I drove down this long, winding road, fiddling with my GPS and trying to drink my Dr. Pepper, that I would randomly look up, see their sign and decide to stop in.
<lol>
It just doesn’t work like that. Relying on one sign is stupid.
Toad Hall isn’t stupid. They had 25 signs!
By using 25 signs, Toad Hall warmed me up. They got my attention. They made me like them and gave me a good reason to stop at their restaurant.
You have to do the exact same thing when you are launching your product.
Just because you have a great product and an established audience doesn’t mean it will be a best-seller. Especially if you rely on just one sign.
My recommendation is to use a multi-part education-focused email series to launch your product.
Let me show you the seven part email series I used to launch the Vault.
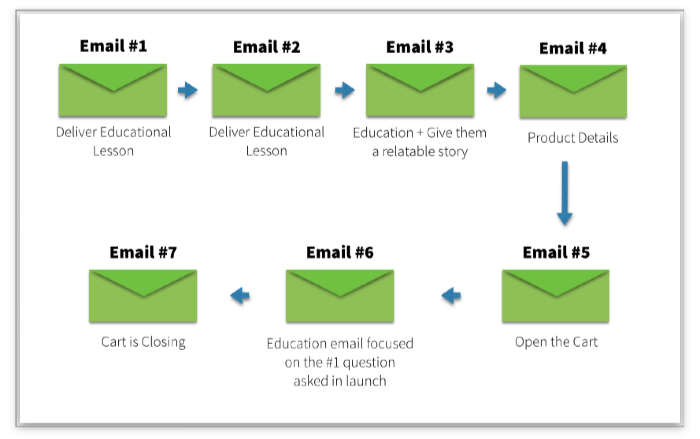
Here is the exact email sequence I used to launch the Vault:
In the case of the Vault, the #1 benefit that I highlighted in the pre-launch educational series was how to properly structure a product launch.
![]()
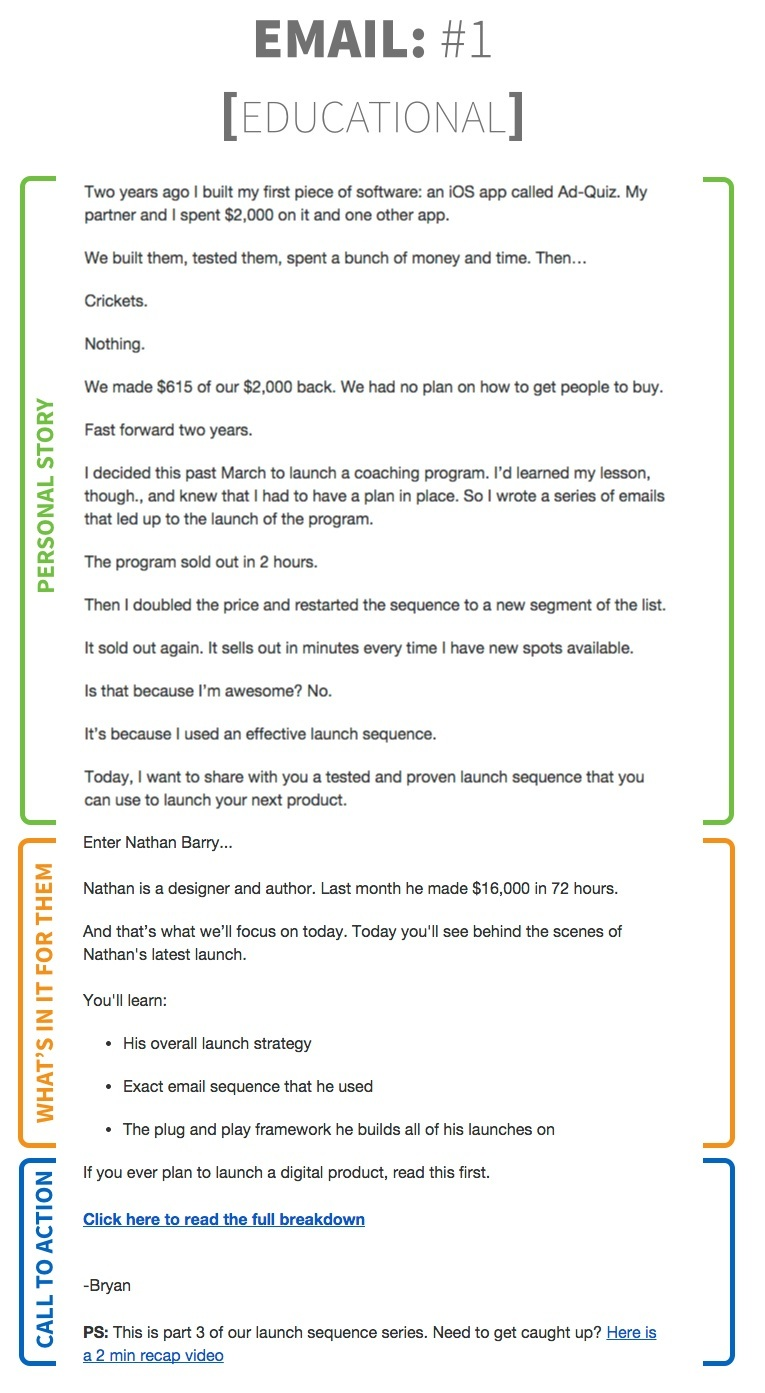
I chose to use case studies as the centerpiece of my educational emails. This allowed me to gain authority in the mind of the reader by positioning myself and my product next to established authorities that they respected.
![]()
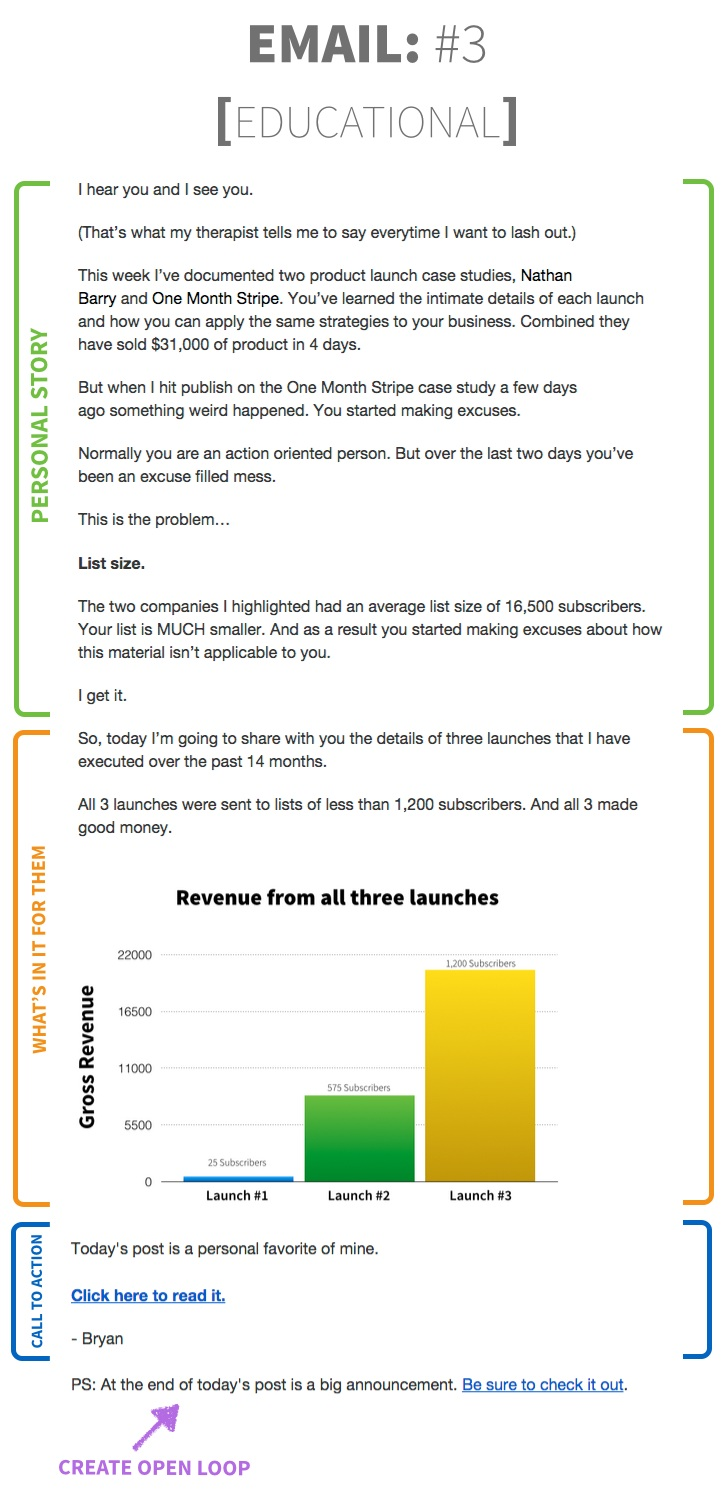
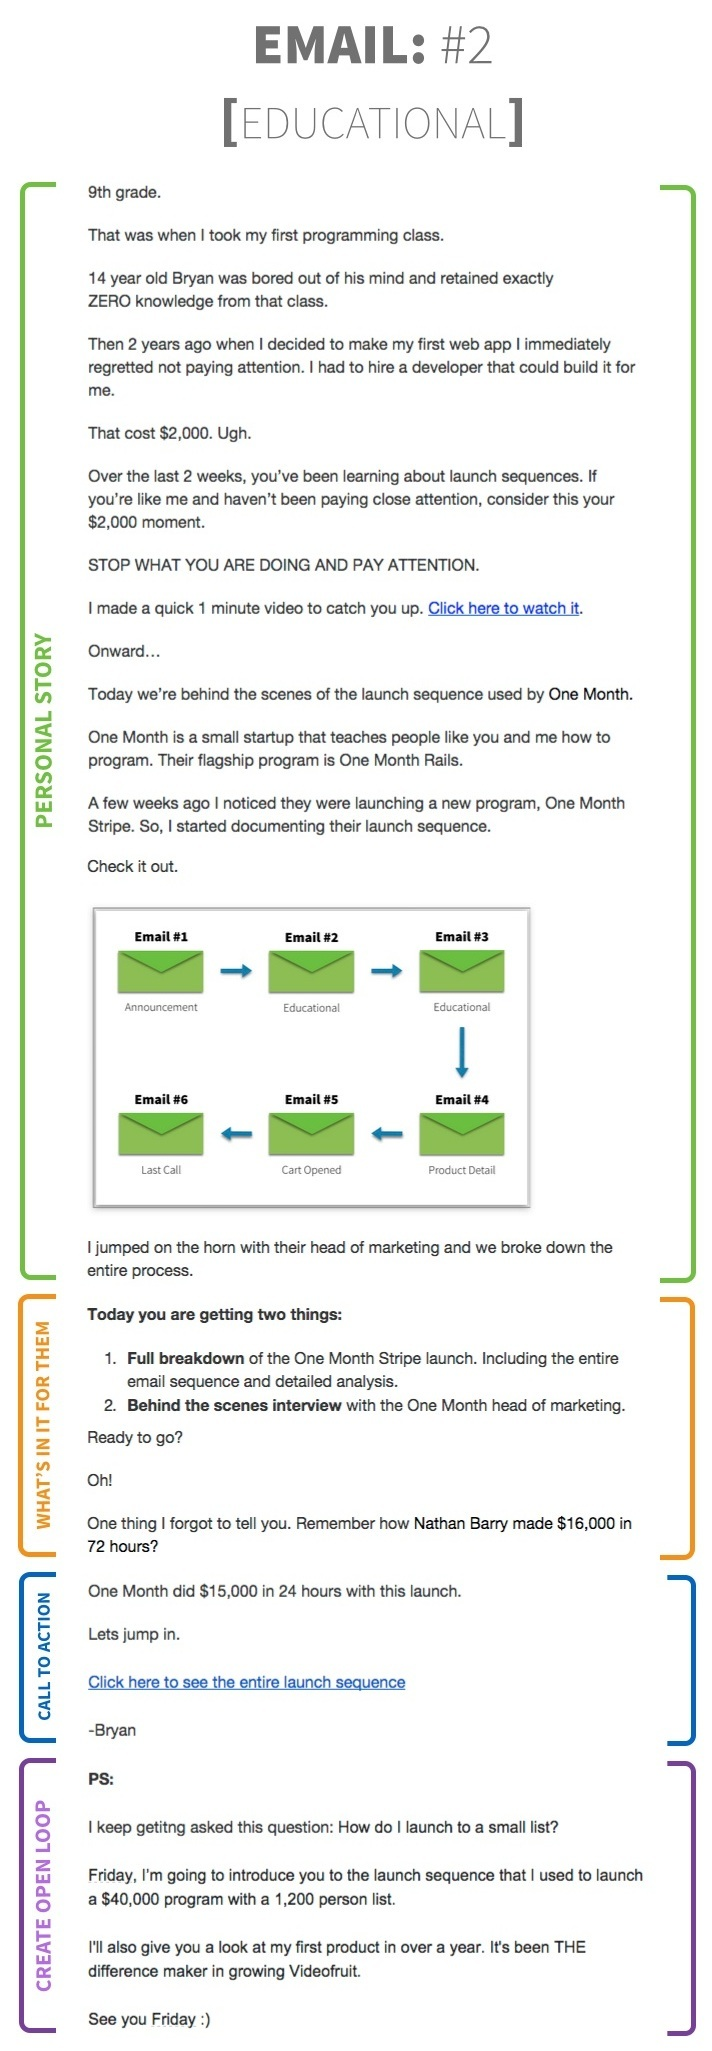
This email is written with the intent to show them that you don’t have to have a massive audience to have success online. By sharing a personal story I was able to relate to the reader.
![]()
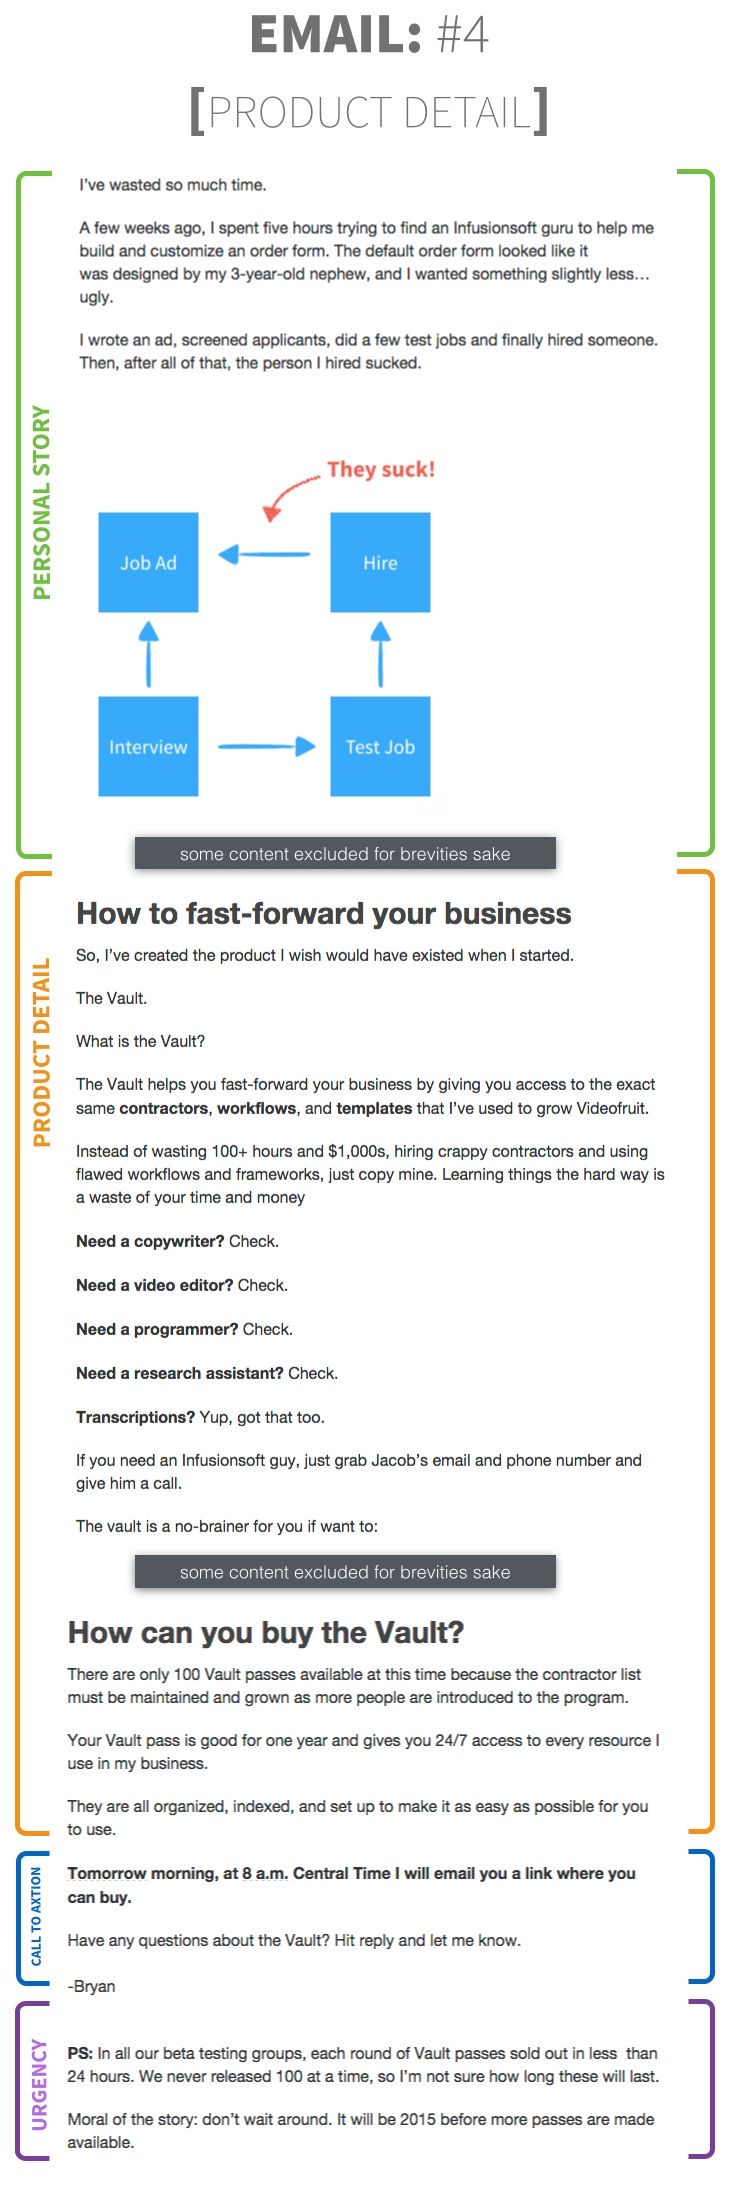
This is the MONEY email. This is where you reader first learns about the features and benefits of your product.
It’s also important to let them know in this email that the product will be available for sale tomorrow morning at an exact time.
![]()
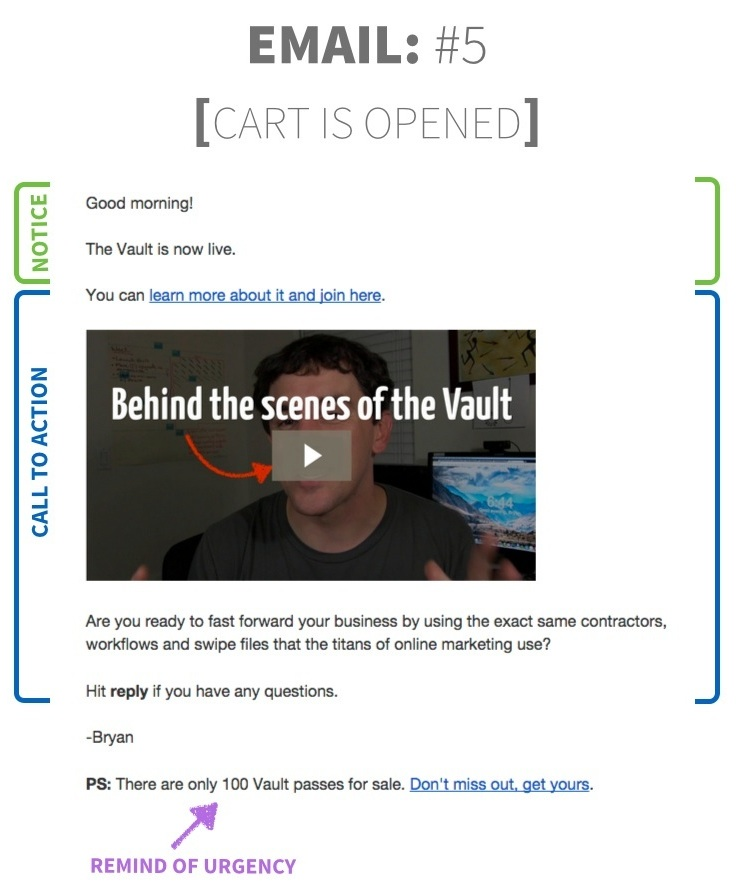
The ONLY purpose of this email is to get the reader to click through and land on the sales page.
Do not put any other links or unnecessary information in this email. Short and concise wins.
You may also want to send text messages to announce your open cart. Check out Remind Them to start building your SMS list.
![]()

The pivot email comes in the middle of your launch window, between the opening and closing emails.
The pivot email allows you to….pivot your sales pitch if necessary. After my initial influx of sales on launch day things slowed down drastically.
So, I sent an email to everyone who bought and asked them “What is the #1 reason you bought the Vault?”
Their answer surprised me.
See, I had framed the Vault as being a resource to learn how to launch a product; however, everyone who bought did so for the contractors list.
The pivot email enabled me to make up for my mistake by changing my sales pitch to focus on the contractors list and its benefits instead of the launch sequence training.
![]()
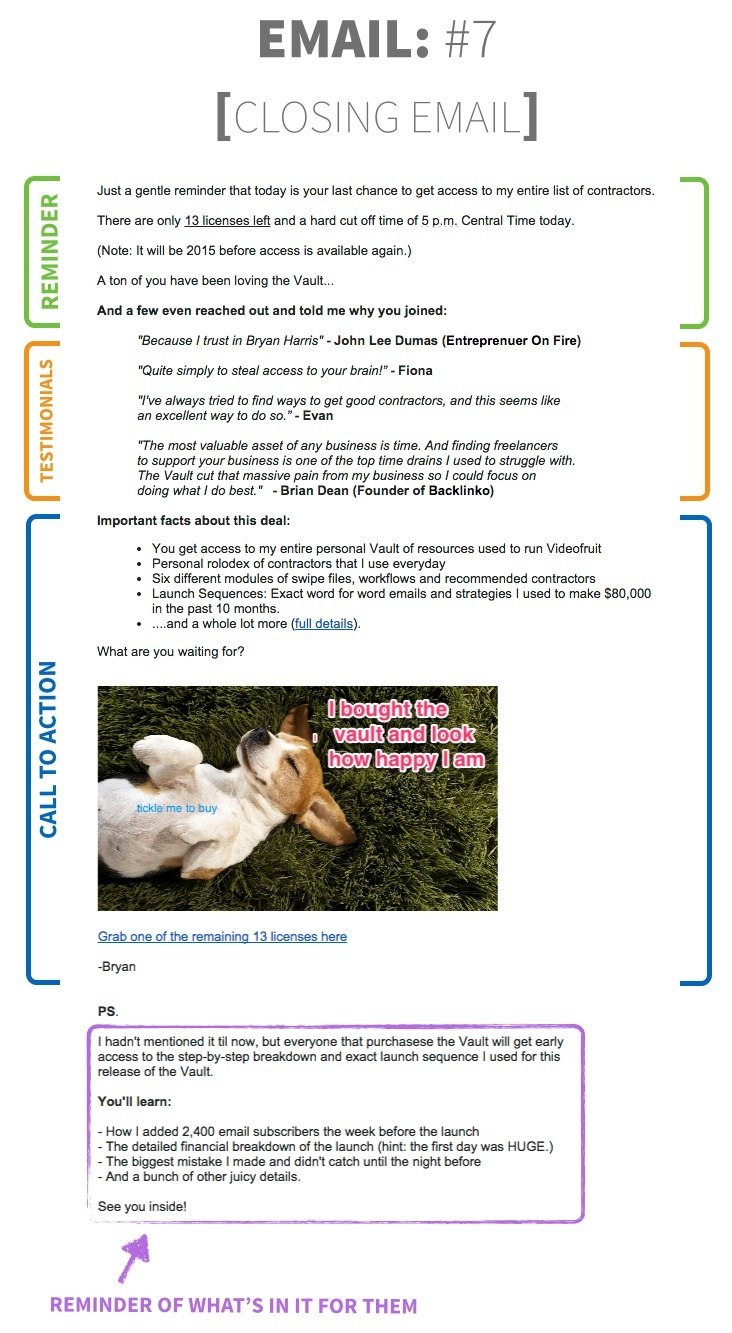
People are busy and procrastinate. Send them a “It’s going away in X hours” email before your launch window expires.
***
The results: $10,000 in sales in the first 24 hours of launch.
This was the first time I had ever made money from my own product. Nothing compares to the feeling of having an idea, validating that idea, building that idea and then releasing it into the world and people paying money for it.
I can’t guarantee you results (that would be irresponsible), but I will tell you this: You WILL have more success if you take the time to validate your product idea before creating it.
It also helps to have a step-by-step plan to help make it happen.
Want to get 4x my results?
The launch series that I just describe is what we used to launch our first product, the Vault.
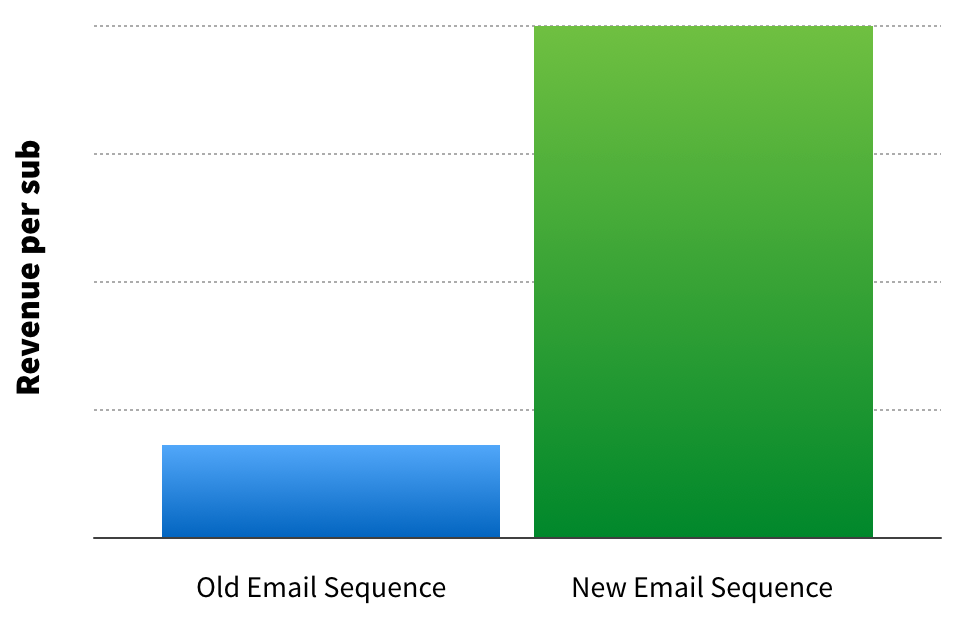
That launch produced $4 for every subscriber on the list.
It’s been a few years since we first launched the Vault and we’ve launched two new flagship products in that time.
With each launch, we’ve tweaked and perfected each step of the process to make it more effective.
How much more effective?
With this original process our revenue per subscriber was $4. With the new launch framework we use it has risen to $22 per subscriber.
What does that mean for you?
This morning at 6 AM Central time we released the Product Validation Template in Slingshot (our newest product).
The Product Validation Template will help you execute every step of the process we outlined in this post and will also give you the new email framework we use when launching any product or service.
So, if you feel overwhelmed and not sure what to do next, your next step should be to grab a Slingshot Annual plan and follow the road map we lay out for you.
There are 37 total steps you need to go through to properly pre-sell and validate your product, and each one is meticulously detailed for you in Slingshot.
Here is a quick overview of how it works.
If you want to execute this process without the help of Slingshot, you can grab our brief execution checklist below.
Or with Slingshot you can be up and going with a personalized road map, detailed instructions, individual coaching and the support of our entire team in less than 60 seconds.

