It’s been two weeks.
That’s when you last got an update on the status of List Goal, the new email list-building app that we’re creating together live on this blog.
The app is coming along really well. It looks sexier than the last time we talked and it actually works now. (Woot!)
Today you will get…
1) Full rundown of the entire development process
2) Sneak peak at the app (!!)
3) Chance to give your feedback on one really important feature.
Let’s get going.
How a writer can build a web app from scratch
Several of you have asked how you can build an application like List Goal for your business.
Teaching software development isn’t the focus of this blog. However, using lightweight apps as a lead generation mechanism is an incredibly effective marketing strategy. So we are going to approach the subject from that angle.
To build an application like List Goal there is a seven step process that you need to follow.
Step 1: Determine the exact problem you are solving.
Building software can easily evolve from a 10-hour weekend project to a 300-hour, multi-thousand-dollar time suck.
Before you hire a programmer, design a user interface or think about touching any code, you first have to answer these two questions:
Question #1: “What is the exact problem I am solving?”
AND
Question #2: “What is the simplest way to solve that problem?”
For example:
The problem I wanted to solve was staying focused on my most important business objective, building my email list.
I determined that the simplest way to solve this problem was to constantly keep my goal in front of me.
We open hundreds of new browser tabs per day. By putting a reminder of my goal in the new tab window, it would be incredibly hard to lose focus on that goal.
What is the exact problem List Goal solves? Losing focus on building my email list.
What is the simplest way to solve that problem? Remind myself of the goal hundreds of times per day.
Step 2: Figure out what you want it to look like.
At this stage most people start coding. Bad move.
The next step is to figure out what you want your app to look like. There are a lot of tools to help you do this. However, I prefer old fashoin pen and paper.
The main objective is to think through and design the entire user experience.
Here is what my initial sketch of List Goal looked like:
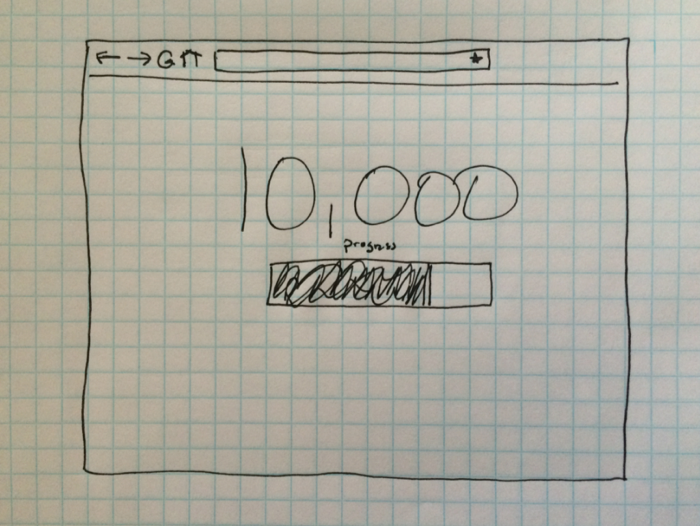
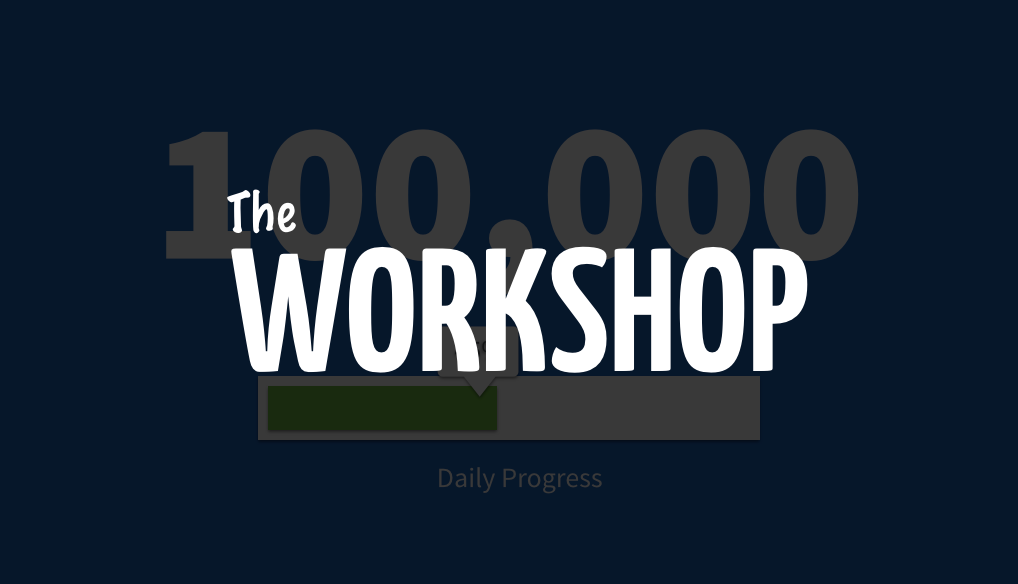
This is the main user interface that you will see every time a new tab is opened in your browser. This screen has two objectives: 1) remind you of your goal; and 2) show your daily progress towards that goal.
There is one large number in the middle of the screen, your list size goal.
When you first install the app, you choose how big you want your email list to be. Then that number is displayed prominently on this screen.
There is also a progress meter directly below your goal. This shows you your daily progress.
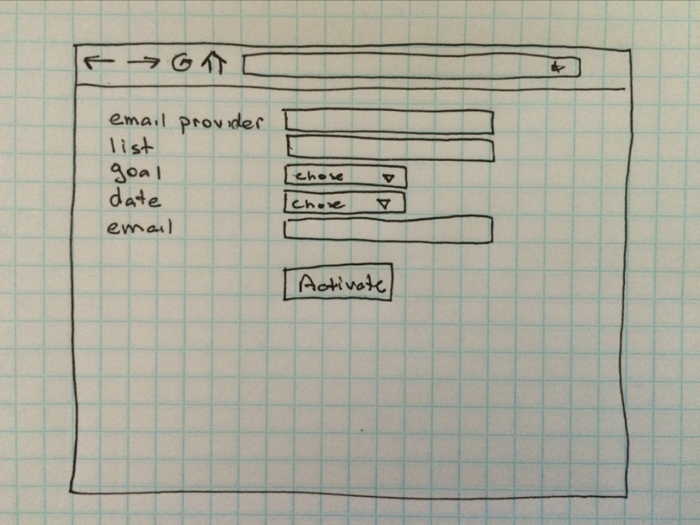
The user settings screen is first accessed when the app is installed. It also can be accessed at any time via the settings menu of your browser.
Before the app is activated, the user must first connect it with his or her email service provider. Then the user chooses the list goal and due date of that goal.
Lastly, the user enters his or her email address and activates the app.
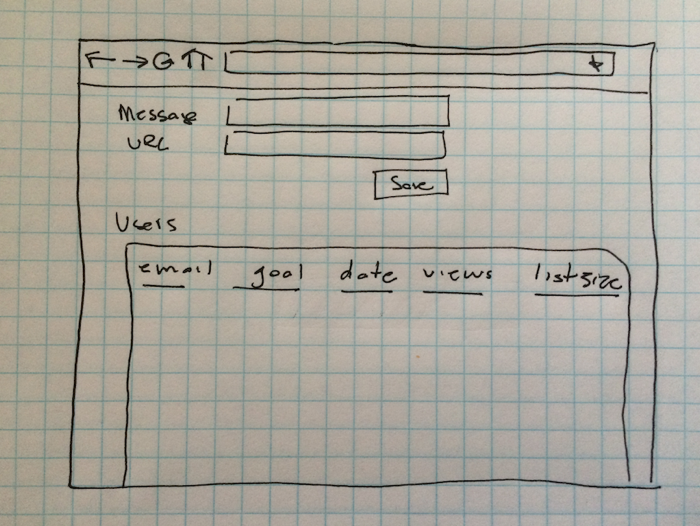
This screen allows me to troubleshoot any potential issues by seeing the key metrics of each user account.
There is also a basic messaging system built in that allows me to display notes and links on the main user interface of the app.
Step 3: Make it look pretty.
Now that you have a clear objective for your app and you’ve thoroughly thought out and sketched the entire user experience, it’s time to make it look pretty.
To do that, I use Keynote as a mock-up tool.
I recorded the entire process of designing List Goal for you to see…
Step 4: Create a walkthrough video.
Now that you have a mock-up prototype of your software, create a video walkthrough of the entire application.
The purpose of this video is to communicate to the developer the core functionality.
You can use the free screen recording tool Jing or a paid tool like Camtasia to record your screen along with narration.
Here is the List Goal walkthrough video:
Step 5: Write a spec document.
Next you need to document every feature of the application in a written document.
This will be used in conjunction with your walkthrough video to clearly communicate to your developer the core functionality of the app.
This document is also incredibly helpful for you as you test the developers work.
The easiest way to create this spec document is to transcribe your video walkthrough from Step 4 and use bullet points to list out the major elements you covered.
I have found Google Docs to be the best application to use, as it’s easy to share and allows you to collaborate with your entire team.
Here is the List Goal spec document. (access here)
Step 6: Set up project management.
Now you need to organize your project management system. My preferred software is Trello.
In order for your project to run smoothly, stay under budget and be delivered on time, you have to be organized.
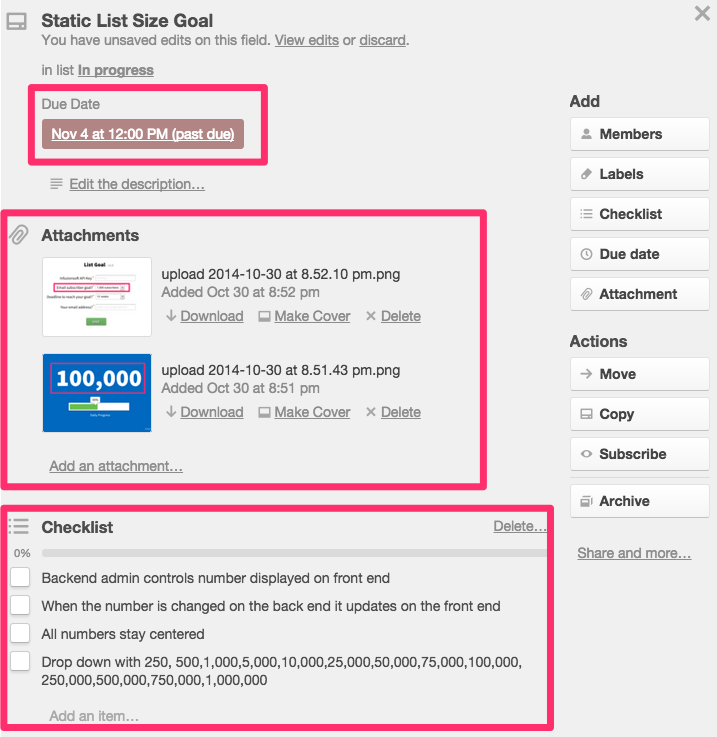
Before any coding starts I break down every core feature into it’s own individual card inside of Trello. A full description of that feature, screenshots and implementation checklists are included for each.
My Trello board is organized into five lists:
- Ideas: Future features we may add
- Next up: Features that are to be worked on soon
- In progress: Features that are being built right now
- Testing: Features that the developer has added and that I am testing
- Done: Features that have been tested and approved for deployment.
Each feature card is moved to the appropriate list throughout the development process.
Here is a snapshot of the Trello board for List Goal.

Here is a sample card from this project.
Step 7: Watch it come to life.
Now you are ready to turn your project over to your developer.
The application that is delivered to you will be a direct reflection of your level of preparation and attention to detail. So don’t get lazy.
It’s been four weeks since we started work on List Goal and the developer has JUST given me the first working version.
Want to see it?
Take a look…
Can I get your opinion?
In our next Workshop post, I’ll show you the hiring system I used to find a quality programmer who built List Goal for less than $500.
But first…
I need your help.
List Goal is alive, but it’s far from perfect.
One thing I am struggling with is what numbers to show on the main user interface.
I’d like for you to tell me what would help you the most.
Two options are up for vote:
Option 1: The current version
This option features your goal number and a progress meter showing your daily progress in percentage points.
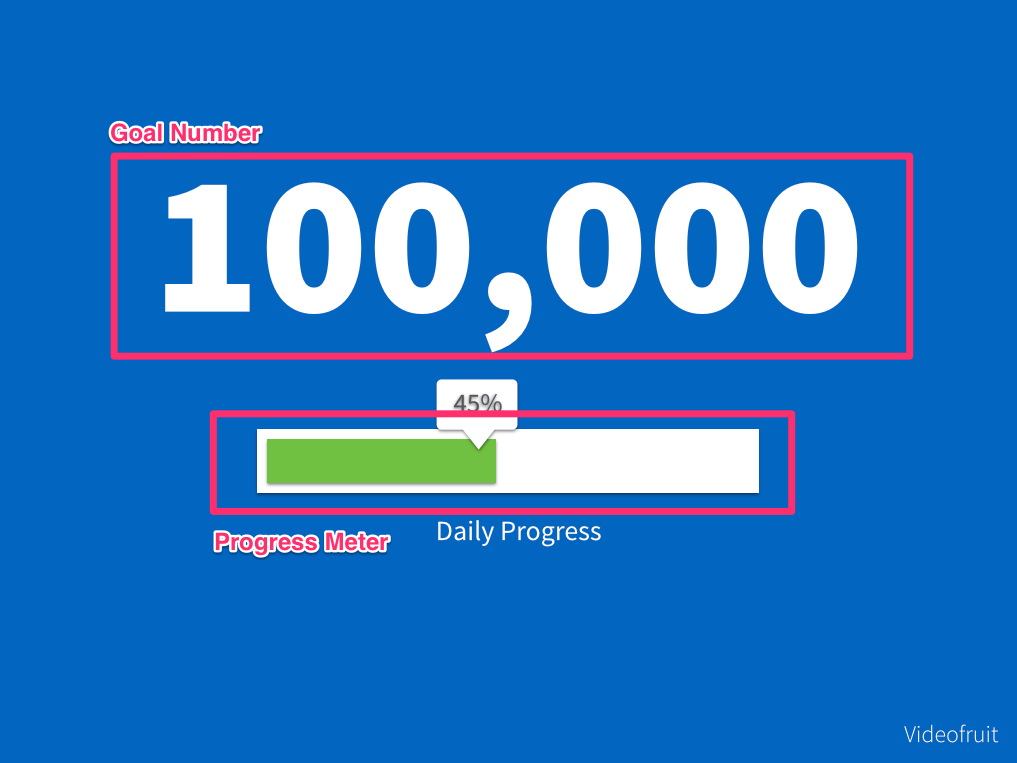
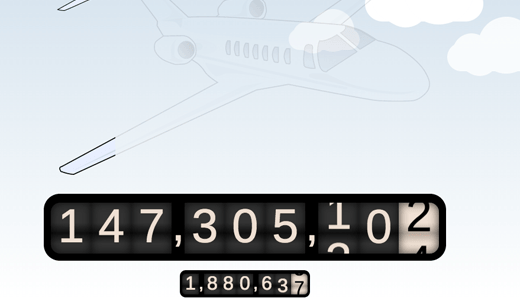
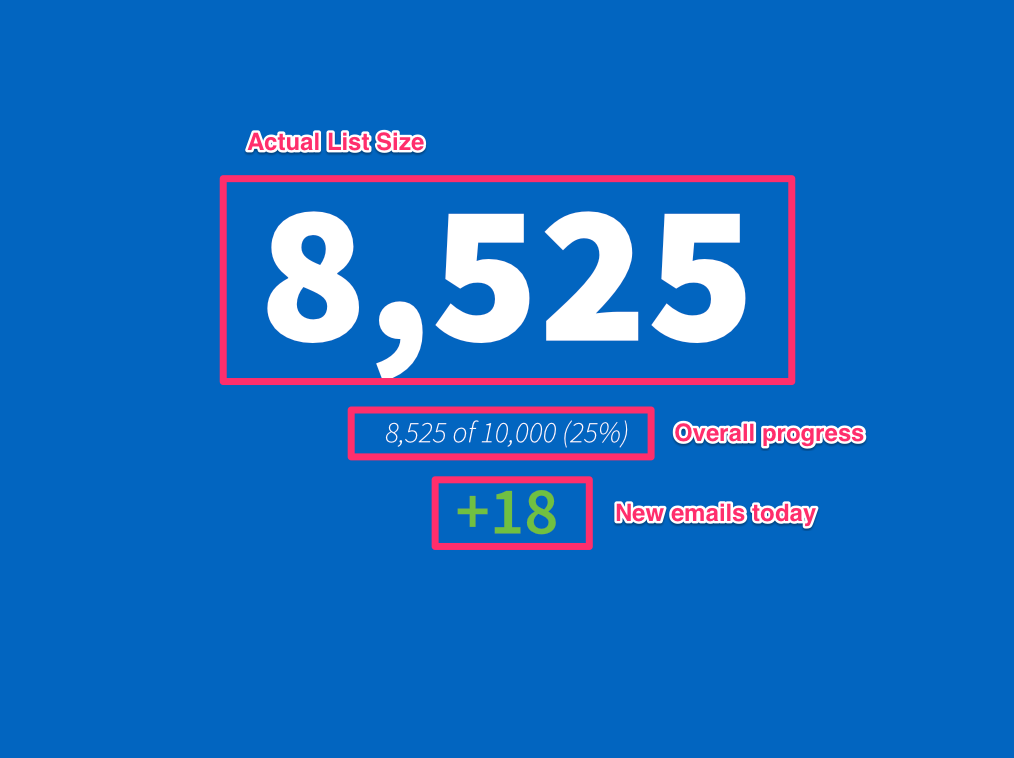
Option 2: Alternate version
This option would show your current list size as the large number and would NOT have a progress meter. Instead, it would have the number of new email subscribers you’ve added today in integer form (as opposed to % points).
Which would help you stay more motivated? Let me know in the comments section below.